

Preserving Ocean Beauty Through Marine Photography: An Environmental Perspective
Introduction to Marine Photography and Its Importance
Marine photography is more than just taking pictures underwater; it's a powerful tool for telling the ocean's story. This type of photography shows us the beauty beneath the waves, which many of us wouldn't see otherwise. But it's not just about beauty. Marine photography plays a crucial role in conservation efforts. By capturing the vibrant life and the challenges underwater environments face, photographers can inspire people to care about and protect our oceans. Think of it as giving the ocean a voice, showing the world what we stand to lose if we don't act to preserve it. Through their lenses, marine photographers highlight issues like coral bleaching, pollution, and the impact of climate change on marine life. Their work encourages environmental action and fosters a deeper connection between people and the ocean. In a way, marine photography is a bridge between the aquatic world and us, making it an essential endeavor for those passionate about preserving ocean beauty and its inhabitants.

Capturing the Ocean's Majesty: Techniques in Marine Photography
Capturing the vast, stunning beauty of the ocean requires more than just a click of the camera. You have to dive deep—sometimes literally—into the techniques that make marine photography not just possible, but spectacular. First off, lighting underwater is a whole different ball game. The deeper you go, the more colors fade. Red disappears first, followed by orange, and then yellow. To combat this, seasoned photographers use external flash units or strobes to bring colors to life. It's not just about lighting though, understanding the water's movement and how marine life behaves is crucial. Patience is key. Sometimes, you have to wait for that perfect moment when a curious turtle swims by or a school of fish forms a mesmerizing pattern. Composition matters too. With the unpredictable nature of water, framing the right shot takes a mix of preparation and spontaneity. Wide-angle lenses are your best friend for capturing the vastness of the sea and its inhabitants, while macro lenses are perfect for honing in on the tiniest sea creatures. And let’s not forget about the importance of safety and respect for the ocean's inhabitants. Successful marine photographers know their limits, always prioritize the well-being of marine life over getting the shot, and are advocates for preserving the beauty they aim to capture. So, whether you’re hovering near the surface or exploring deeper territories, remember, marine photography is more than just capturing images; it’s about conveying the ocean’s majesty and advocating for its preservation.
Marine Photography as a Tool for Environmental Awareness
Marine photography does more than dazzle us with the mysteries beneath waves; it shines a spotlight on the unseen, urging us to protect what we're in danger of losing. Each stunning snapshot is a call to action. Through the lens, photographers reveal the impacts of pollution, climate change, and overfishing on our oceans. These vibrant images capture everything from the fragile beauty of coral reefs to the intimate lives of marine creatures, showing not just what exists but what's at stake. It's visual storytelling that makes distant problems personal. By sharing these images, we're not just admiring the ocean's wonders; we're reminded of our responsibility to preserve them. Marine photography, therefore, is a potent ally in the fight for environmental conservation. It educates, it inspires, and most importantly, it pushes us to act before it's too late.
Understanding the Impact of Human Activities on Marine Ecosystems
Human activities have a significant impact on marine ecosystems, often harming the delicate balance of life under the sea. From pollution to overfishing, our actions put immense pressure on ocean habitats and the species that call them home. Pollution, one of the biggest threats, comes in many forms, including plastic waste which endangers marine life through ingestion and entanglement. Furthermore, chemicals and pollutants from industries find their way to the ocean, affecting the water quality and health of marine species. Overfishing depletes fish populations faster than they can reproduce, disrupting food chains and leading to the decline of entire ecosystems. Coastal developments destroy crucial habitats like mangroves and coral reefs, which serve as nurseries and shelter for many marine creatures. Climate change, driven by human activity, increases ocean temperatures and causes acidification, further endangering marine life and ecosystems. By understanding these impacts, we can take steps to mitigate our footprint and protect the ocean's beauty for future generations.
The Role of Marine Photography in Conservation Efforts
Marine photography does more than just capture the ocean's beauty; it's a powerful tool in conservation efforts. By sharing images of underwater life and habitats, photographers shine a light on what's at risk. Seeing the vibrant colors of coral reefs or the intricate behaviors of marine animals sparks a connection. It turns the hidden mysteries of the ocean into something personal. People care more about what they understand and feel connected to. This is where marine photography makes a big difference. It doesn't just show the problems, like pollution or overfishing, but also celebrates the ocean's wonders. This dual role helps inspire action. Whether it's through an online share, a gallery exhibition, or a photo in a magazine, these images have the power to mobilize change. They encourage people to reduce plastic use, support marine protected areas, or even join conservation projects. In essence, every photo has the potential to be a call to action.
Challenges Faced by Marine Photographers
Marine photographers dive deep, literally and metaphorically, to capture the unseen beauty of the ocean. Yet, it's no easy task. First, light behaves differently underwater. Colors like red and orange disappear first, leaving photos with a blue or green tint unless corrected or special lighting is used. Then, there's the water itself – always moving, which can blur images if not managed correctly. Another big hurdle? Wildlife doesn't pose. Photographers need patience and luck to get that perfect shot. Plus, the deep sea is not a friendly place for equipment. Saltwater corrodes, pressure increases, and the risk of damaging expensive gear is always present. Finally, accessing underwater sites often requires skill in scuba diving, adhering to safety and environmental regulations to protect the fragile ecosystems they aim to photograph. Despite these challenges, marine photographers are driven by a passion to reveal the ocean's mysteries and advocate for its preservation.
Highlighting Success Stories: Positive Outcomes from Marine Photography
Marine photography does more than just capture the breathtaking beauty of the ocean. It can be a powerful tool for change. For instance, imagery from beneath the waves has been pivotal in sparking global movements towards ocean conservation. Let's look at a few success stories. The documentary "Chasing Coral" utilized stunning underwater photography to showcase the devastating impact of coral bleaching. Its widespread viewing has increased public awareness and pushed for policies protecting coral reefs. Similarly, photographers like Brian Skerry have brought the intimate lives of sea creatures into the public eye, leading to a surge in empathy and a willingness to protect these underwater inhabitants. Their work fuels conservation efforts, proving that a picture is indeed worth a thousand words when it comes to saving our oceans. By highlighting the beauty that exists below the surface, marine photography inspires action, ensuring these environments receive the protection and appreciation they deserve.
How to Get Started with Marine Photography
Diving into marine photography begins with gear and knowledge. First, grab a waterproof camera. It doesn't have to break the bank. Start with something simple that can handle underwater pressure. Next, learn the basics of photography - like framing and lighting. Water alters light, so understanding how to work with or against this can make or break your shot. Study marine life behavior too; knowing when certain creatures are most active can help you capture the best moments. Practice in shallow waters before diving deep. This approach gives you confidence and helps refine your skills. Remember, respect the ocean. Don’t disturb marine life or their habitats. Marine photography isn’t just about taking stunning pictures; it’s about celebrating and protecting ocean beauty.
Ethical Considerations in Marine Photography
When snapping shots beneath the waves, it's not just about capturing the beauty. Ethical marine photography plays a vital role in preserving ocean life. Always prioritize the well-being of marine creatures over getting the perfect shot. This means keeping a safe distance to avoid stressing or harming them. Remember, the flash from your camera can disorient smaller fish and other sea life, so use natural light whenever possible. Never touch, chase, or feed the wildlife. These actions can alter their natural behaviors and potentially harm their health. Also, be mindful of the underwater environment. Avoid stirring up the seabed or touching the coral, as these actions can damage fragile ecosystems. By practicing responsible marine photography, you contribute to the conservation of ocean beauty for future generations to appreciate.
Conclusion: The Future of Marine Photography in Preserving Ocean Beauty
The future of marine photography holds a promise that goes beyond just capturing beautiful underwater scenes. It has the power to change perspectives, drive conservation efforts, and preserve the beauty of the oceans for future generations. As technology advances, photographers are equipped with more robust and environmentally friendly equipment, allowing them to dive deeper and minimize their ecological footprint. However, the true impact lies in the shared responsibility among photographers, viewers, and policymakers. By showcasing the unseen wonders and the challenges oceans face, marine photography acts as a catalyst for change. It encourages a global dialogue on marine conservation, influencing policies and inspiring individuals to take action. The collective ambition should be not only to admire the beauty of the ocean through a lens but also to ensure that this beauty is sustained and protected. Marine photography, therefore, is not just an art; it's a mission, where every snapshot can contribute to a larger story of hope and preservation.
5 Reasons Seascape Wall Art is a Must-Have in Modern Home Decor
Introduction to Seascape Wall Art in Modern Decor
Seascape wall art isn't just another piece you hang on the wall. It's a vibe, a splash of the ocean's spirit right in your living space. Think about it, who doesn't love the calmness and endless mystery the sea represents? This art pulls that vast, open essence of the ocean into your home. Modern decor loves simplicity and vibes that breathe life into a room. Seascape art does just that. It's like having a piece of the ocean's soul, with its blues, greens, and majestic horizons, adding a serene yet dynamic touch to any room. Whether it's a minimalist seascape with a lone boat or a vibrant piece capturing the sunset over the ocean, these art pieces bridge the gap between nature and modern living. In essence, incorporating seascape wall art into your home decor is more than just a design choice; it's about bringing in tranquility, depth, and a sense of openness that only the sea can offer.

The Timeless Appeal of the Sea: Why Seascape Art?
The sea has a timeless appeal. It's that simple, endless blue that captures the heart and doesn't let go. So, when it comes to modern home decor, seascape wall art isn't just a choice; it's almost a necessity. Why? Well, for starters, it brings a slice of the vast, tranquil ocean right into your living room, bedroom, or whichever corner of the house you choose. Imagine coming home after a long day to the soothing view of the ocean, without actually being there. It's the perfect escape.
Seascapes are versatile. They fit with nearly any decor style - be it minimalist, boho, or even industrial. The colors, the depth, they all add a unique dimension to the room. More than that, seascape art is timeless. While trends in wall art come and go, the beauty of the sea remains constant. Think about it - has the ocean ever gone out of style? Absolutely not.
Also, seascape art is a great conversation starter. It's not just a pretty picture. Each piece tells a story, maybe of a distant storm, a calm twilight, or the vibrant life beneath the waves. This art form connects people to nature and to each other through shared memories of the sea.
In essence, incorporating seascape wall art into modern home decor brings beauty, calm, and a connection to the natural world. It stands the test of time, and honestly, it just feels right. So, when pondering over the perfect piece of art to elevate your home, remember the enduring charm of the sea. It's a choice you're unlikely to regret.
Enhancing Room Atmosphere with Seascape Imagery
Seascape wall art isn't just a pretty picture; it's a game changer for any room's vibe. Imagine transforming a dull space into a tranquil haven or a source of inspiration with just one piece. That's the power of seascapes. They bring the calming effect of water right into your home, which, experts say, can actually lower stress levels. Not just that, these pieces can be a window to the world, making small rooms look more spacious by adding depth. And for those looking to inspire or be inspired, sea imagery, with its endless horizons and adventurous vastness, sparks creativity and dreams. So, whether you aim to bring peace, space, inspiration, or just sheer beauty into a room, seascape wall art does it all impressively.
Seascape Wall Art as a Focal Point in Any Room
Seascape wall art, think about it, just like that gentle ocean breeze, it transforms any room. Got a blank spot? Boom, put in a seascape and watch the room come alive. It's not just about filling space. It pulls you in. Your eyes, they can't help but wander over it, right? It brings that calm, that peace we all crave. And colors, it's like a dance of blues and greens, maybe a splash of sunset orange. Instant mood lifter. Plus, it's versatile. Doesn't matter if your room's got that modern vibe or a more classic feel, seascape fits right in. It's that piece that makes everyone stop and say, "Wow, this room, it’s got something special." So why not? Give that room a focal point it deserves with some seascape wall art.
The Psychological Benefits of Incorporating Seascape Art
Bringing seascape art into your home isn't just about adding beauty; it's a smart move for your well-being. It's fascinating how a simple piece of art can influence our mood and mental health. Here’s why seascape art should be on your wall:
First, it's a natural stress reliever. Pictures of the ocean bring calmness that can lower stress levels. It's like having a piece of the sea’s tranquility right in your living space. Second, seascape art can boost your creativity. The vastness and the endless waves can inspire new ideas and perspectives—perfect for when you're feeling stuck. Third, it enhances your mood. The blues and greens of ocean art are soothing colors that can make you feel more peaceful and happy. Fourth, it can improve focus and productivity. Having a seascape in sight can help center your mind, making it easier to concentrate on tasks. Lastly, it connects you to nature. Even if you're far from the shore, a piece of the ocean in your home bridges that gap, reminding you of the beauty and expansiveness of the natural world.
Incorporating seascape art into your home decor is more than an aesthetic choice—it's a step towards better mental and emotional health.
Versatility in Design: Matching Seascape Art with Home Themes
Seascape wall art slips right into any home decor theme. Whether your home breathes a coastal vibe, cherishes minimalism, or celebrates vibrant colors, there's a seascape to match. Picture this: a serene ocean view for a tranquil, minimalist space. Or maybe a splashy, vivid sunset over the sea for a room bursting with energy. These artworks fit. You're not boxed in. From photographic realism to abstract waves, the variety is vast. Think of them as chameleons. They adapt. Want a soft, gentle touch? Go for pastel seascapes. Seeking depth and drama? Dark, stormy sea scenes are your go-to. Each piece speaks a different language, yet they all whisper the same word: harmony. Incorporating seascape art means never having to compromise your space's character. It's all about finding the piece that whispers to your theme, not shouts over it.
Tips for Choosing the Right Seascape Wall Art
When picking seascape wall art, think simple but impactful. Here's how to nail it. First up, size matters. A massive piece can be a focal point, but a small artwork won't cut it in a spacious room. Play with sizes that complement your space. Next, color is key. Choose hues that mirror the room's vibe or add a splash of contrast. Blue tones soothe; vibrant colors energize. Now, consider the mood. Stormy scenes bring drama, while tranquil beach views breathe calm into your space. Style is a big deal too. Make sure it jives with your home's decor - a modern piece in a vintage room might stick out. Lastly, quality counts. Opt for pieces with crisp details that'll stand the test of time. Stick with these points, and you'll find the perfect seascape wall art in no time.
Creative Ways to Display Seascape Art in Your Home
Seascape art doesn't just hang; it transforms a space. Think outside the standard frame to elevate your decor. First up, consider leaning large seascape pieces against a wall for an effortless vibe—no nails needed. It's casual yet captivating. Next, mix it up by placing seascape prints among shelves filled with books and trinkets. This blend brings a burst of the ocean into cozy corners. Gallery walls? Yes, please. Combine different sizes of seascape art, creating a gallery that tells a story of adventure and calm. For a modern twist, skip the frames. Use wooden hangers for a minimalist touch that keeps eyes on the art. Lastly, think about the unexpected placements—small bathrooms, hallways, or that awkward nook. These spots benefit hugely from the depth and openness seascape art offers. So, get creative and let the sea transform your home piece by piece.
Maintaining and Caring for Your Seascape Wall Art
Keeping your seascape wall art in top shape is straightforward but crucial. First, steer clear of direct sunlight. Prolonged exposure can fade those vibrant blues and serene greens. Next, think about humidity. Bathrooms or kitchens might not be the best spots for your seascape pieces, as moisture can damage them over time. Dusting is essential, too. Use a soft, dry cloth to gently remove dust; avoid using water or cleaners that could harm the colors or the canvas. Additionally, when it’s time to move or store them, wrap your art in acid-free paper. This step prevents scratches and protects against dust and moisture. Lastly, if your art is framed behind glass, a quick swipe with a microfiber cloth keeps it looking crystal clear without scratching the glass. Simple steps, big difference in keeping your seascape looking fresh and tranquil.
Conclusion: Transforming Spaces with Seascape Wall Art
So, what's the takeaway here? Simply put, seascape wall art is not just another piece of decor. It’s a game-changer in modern home styling. It brings the calmness of the sea right into your living space, making it feel both tranquil and vibrant. Whether you’re looking to inject some color into a dull room or create a focal point that speaks volumes, seascape art does the job. It’s versatile, fitting into nearly any room - be it your bedroom, living room, or even your bathroom. Plus, it’s a fantastic way to reflect your love for nature or complement your minimalist theme. In a nutshell, adding a piece of the ocean to your home decor lifts the spirit of your space, makes it feel more open, airy, and absolutely more alive. Don't overlook this powerful yet serene addition to your home.
Embracing the Authentic: Why Ditching the Your Smart Watch for a Real Timepiece Elevates the Surfing Experience
Let me preface this article by thanking the few dozens of visitors who happen to regularly track and find themselves on my website. You’ll have noticed several blanket statement articles that feature general advice to surf and coastal photographers alike. Full disclosure that I’ve deployed some writing services to help with boosting my site content and building out an SEO program that will help with funneling the right community to my work. Being competitive in this market means not only standing out with outstanding work but utilizing all the tools available. Rest assured, when its my own voice and narrative piece, I’ll proudly continue to sign-off with my own personal touch.
Which brings me to the very purpose of this article.
When I’m not asking strangers in the lineup for the time and ensuring I make it to morning meetings and my 9-5, I typically have an analog field watch on over my wetsuit. I’ve always prided my ability to pair my intuition with the analog features from a proper time piece against the sets in the water. (The same might be said for shooting film vs digital…but that’s a different article all together.)
So with that in mind, here are 10 reasons why I think you should ditch your smart watch for an analog timepiece.
Firstly, I’ll often admit to being envious of the friends who regularly track their sessions with digital ease—and sure, those smart gadgets offer plenty of functionality, but when it comes to riding waves, there's something about the timeless charm of a genuine timepiece that speaks volumes. This thought isn’t on most surfers’ minds—if you are lucky enough to have limitless time, then these thoughts around wristwear won’t bear any significance on your surfing. In any case, I want to reach those nostalgic for simpler times.

Ryan Langston Luna with the Montoir Dive Watch
Connection with Tradition: Picture this: you're strapping on your leash, feeling the anticipation building with each passing moment. Now imagine wrapping your wrist with a watch that's more than just a piece of tech – it's a symbol of craftsmanship, heritage, and the timeless spirit of adventure. A real timepiece connects you with generations of surfers who've embraced the call of the ocean and relied on their trusty watches to keep time and tide. The same definitely applies for those of you who ride classic surf tech or intentionally attempt to evoke classic style in the water. On that note, regarding style…

Matthew Crofton with the Montoir Diver, pre-surf check.
Elevated Aesthetics: Let's be real – style matters, especially when you're carving up the waves like a boss. While smartwatches scream "tech geek," a finely crafted timepiece whispers sophistication and class. From the polished case to the intricate dial, every detail speaks volumes about your taste and appreciation for finer things. Who needs flashy screens when you can rock a look that's as timeless as surfing and the ocean itself?
Built to Last: When you're out there conquering the surf, the last thing you need is a flimsy gadget crapping out on you. Unlike smartwatches that can be as fragile as a snowflake, a properly selected timepiece is built like a tank, ready to take on whatever the ocean throws your way. Water-resistant, shock-resistant, and with a movement that mimics the kinetic energy of the ocean, putting to shame those digital toys. A quality watch is your most reliable companion in the lineup whether you are timing the sets or deciding when its time to head in.
Escape the Digital Rat Race: We live in a world where we're constantly bombarded by notifications, texts, and emails – even when we're supposed to be engaged with nature, catching waves. By ditching the smartwatch, you're reclaiming your freedom and disconnecting from the digital noise. No more distractions, no more buzzing alerts – just you, your board, and the boundless beauty of the ocean. It's a recipe for pure, unadulterated bliss.

Mindful Presence: Surfing is all about being in the moment – feeling the rhythm of the waves, tasting the salt on your lips, and letting go of everything else. With a real timepiece on your wrist, you're reminded to savor each precious second, to embrace the here and now with open arms. It's a subtle yet powerful reminder to live life to the fullest, both on and off the water.
Timeless Experience: Every surf session is a fleeting masterpiece, a symphony of sun, sea, and soul-stirring beauty. A real timepiece honors those moments, capturing the essence of timelessness in a world that's constantly changing. Whether you're chasing the perfect wave or simply soaking up the sunset, a quality watch serves as a tangible reminder of the magic that surrounds us every day. No interruptions from work—and a great excuse to avoid notifications.
Surfing with Style: A little more on style, because it's a statement of style and individuality, a nod to the surfers who came before and paved the way for our own adventures. Whether you prefer the rugged charm of a diver's watch or the understated elegance of a field watch, there's a timepiece out there that's as unique as you are, as unique as board selection, and as unique as your time on the face of the wave.

Montoir Dive Watch
Honoring Heritage: There are too many parallels between horology and surf history to work through. Surfing isn't just a sport – it's a way of life, steeped in history, culture, and tradition. By choosing a real timepiece over a soulless gadget, you're paying homage to that heritage, honoring the pioneers who blazed the trail and paved the way for future generations. It's a small yet meaningful gesture that speaks volumes about your commitment to preserving the spirit of surfing for years to come.
Personal Connection: Your watch isn't just a piece of gear – it's a part of who you are, a reflection of your personality and passion for adventure. Whether you're rocking a vintage classic or a modern boutique assembly, your timepiece tells a story, a narrative of where you've been and where you're headed. It's a conversation starter, a bond that connects you with fellow surfers and enthusiasts who share your love for the ocean. Besides, has anyone in the lineup ever told you, “Cool Apple Watch” and really meant it?
Because You Deserve the Best: At the end of the day, surfing is about more than just catching waves – it's about embracing life with open arms, seizing every opportunity to create memories that last a lifetime. So why settle for second best when you can have the real deal? Treat yourself to a quality timepiece that's as epic as your surf adventures, and watch as the waves of inspiration carry you to new heights of stoke and satisfaction. Use it or lose it as they say. A well selected watch will last decades—that mini smartphone on the other hand is a ticking time bomb headed for a landfill.
That’s my little soapbox on time. MAYBE more Phil-o-surfy to come.
-Phil H.
Be sure to checkout this gallery of work I did with an up and coming, hand crafted, Swiss assembly watch brand MONTOIR
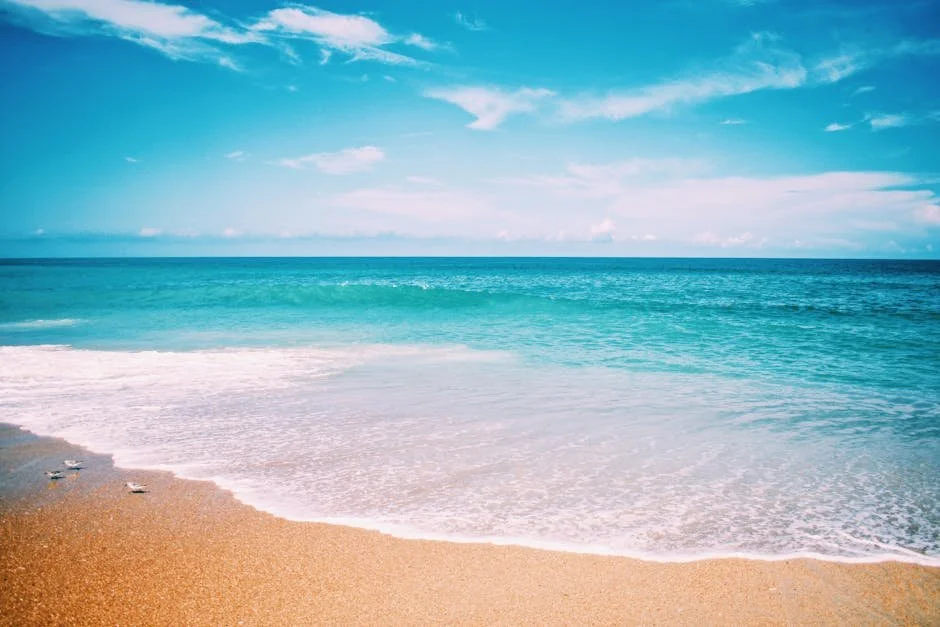
5 Tips to Capture the Perfect Beach Landscape Photography
Introduction to Beach Landscape Photography
Beach landscape photography isn't just about snapping shots of the sea. It's about capturing the essence of the coastline, where the sea meets the land, under the sky. Think of it as painting with your camera, where light, timing, and composition play crucial roles. The goal? To capture a moment that tells a story, evokes an emotion, or simply showcases the beauty of the beach in ways people have never seen before. Whether it's the golden hour casting warm hues across the shore or a storm brewing over turbulent seas, beach landscapes can dramatically differ yet always mesmerize. Before diving into techniques, remember this journey starts with observing, feeling, and understanding the unique qualities of the beach you aim to photograph.

Planning Your Beach Photography Session
To nail that perfect beach landscape shot, planning is your best friend. First, consider the time of day. Early morning or late afternoon offers softer light, making your photos look magical. Midday sun can be harsh, creating strong shadows and overexposed spots. Next, check the weather. A clear blue sky is nice, but clouds can add drama and depth to your photos. Don’t shy away from windy days either; they can add movement and life to your shots. Also, research your beach location. Look for unique features like rock formations, piers, or dunes that can serve as interesting focal points. Tides are crucial too. Low tide reveals textures and patterns in the sand, potentially more interesting than high tide scenes. Lastly, scout your spot before you start shooting. Walk around, see how the light plays with the landscape, and plan your shots. A little prep can make a big difference in beach photography.
Choosing the Right Equipment for Beach Landscape Shots
When it comes to beach landscape shots, having the right gear makes all the difference. First up, your camera. Any decent DSLR or mirrorless camera should do the trick, but pay attention to weather-sealing—beaches can be windy and sandy. A weather-sealed camera can handle that fine dust without a hiccup. Next, lenses. A wide-angle lens is your best friend here—it captures the vastness of the sea and the sky. Think something along the lines of 16-35mm. But, a good zoom lens, say, 70-200mm, can also be handy. It's perfect for picking out details like distant ships or surfers catching waves. Don't forget a sturdy tripod. Beaches often mean long exposure shots to get that silky smooth water effect, and stability is key. Lastly, a polarizing filter. This isn't just another accessory—it's a game-changer. It cuts glare from the water and gives the sky a deep, rich blue. It's like turning up the dial on your beach scene from great to wow. So, gear up right and those beach landscapes will pop like never before.
Composing Your Beach Landscape Photograph
When taking photos at the beach, how you arrange everything in your shot, or compose it, makes all the difference. First, think about the rule of thirds. Imagine your image is divided into nine equal parts by two horizontal and two vertical lines. Place interesting parts of your scene along these lines or at their intersections. This technique creates balance and draws the viewer's eye through the photo. Next, play with perspectives. Don't just shoot from standing height. Get down low for a unique view of the sand textures, or climb up high to capture the vastness of the ocean. Also, use leading lines. These could be the shoreline, a boardwalk, or even footprints in the sand. They guide the viewer's eye deeper into the scene, adding depth. Remember to keep it simple. Too much clutter can distract. Focus on one key element, be it a striking rock, a wave, or a colorful sky, to give your photo a clear focus. Lastly, timing is everything. Early morning or late afternoon light, known as the golden hour, gives your landscape a warm glow, softer shadows, and stunning sky colors. With these tips, you'll compose beach landscapes that grab attention and trigger emotions.
Best Times to Capture Beach Landscapes
To nail that perfect beach landscape photo, timing isn't just everything; it's the main thing. You might already know this, but the best photos often come from catching the right light. At the beach, this magic happens twice a day – early in the morning and late in the afternoon. Photographers call these times the "golden hours." During these times, the sun is low in the sky, casting soft, warm light that makes everything look better. It's not just about the light, though. Early mornings at the beach are usually less crowded. This means you can capture the serenity of the sea without a bunch of photo bombers in your shot. Plus, the wind is often calmer in the early hours, giving you the chance to get crystal-clear reflections on the water if that's your thing. Late afternoons also have their perks. Aside from the incredible lighting, you might catch some stunning silhouettes or the rich colors of a sunset. So, if you're looking to capture beach landscapes that truly impress, aim for the golden hours. Trust me, the extra effort to wake up early or hang around as the day winds down is totally worth it.
Working with Natural Light and Weather Conditions
Natural light and weather play massive roles in beach landscape photography. To nail the shot, chase the golden hour—just after sunrise or before sunset. This soft, warm light adds magic to your photos, enhancing both colors and contrasts. Bright midday light? Harsh and not flattering. But, early and late day? Golden and perfect. Cloudy days are surprisingly good too; they diffuse sunlight, making your beach shots moody and dramatic. And don't forget the wind. It shapes waves and sand patterns, adding movement to your shots. Weather and light might seem tricky, but they're your allies. Work with them, not against them, to capture stunning beach landscapes.
Understanding the Importance of Perspective and Angle
Getting the right perspective and angle can make or break your beach landscape photos. Think of perspective as where you stand and angle as where you point your camera. Changing up your perspective can add depth or highlight aspects of the beach you want to emphasize. For instance, shooting from a high vantage point gives a grand, wide view, showing the beach's vastness. On the ground, you can capture the texture of the sand or the waves crashing. The angle is crucial too. Shooting straight on can capture the beach's raw beauty, but playing with angles, like shooting towards the sun for silhouettes or against it for a backlit effect, can add drama. Here’s the takeaway: move around, go high, go low, and tilt your camera to find those unique shots. It’s about experimenting until you nail that perfect photo. Keep it simple and direct - your pictures will speak volumes.
Tips for Capturing the Motion of Waves
Capturing the motion of waves can make your beach photos stand out. Here's how to get it right. First, experiment with a slow shutter speed. This blurs the water, giving it a smooth, dreamy look. Aim for a shutter speed of 1/15th of a second or slower, but you might need to experiment with your settings. For images without blur--if you want to capture motion in focus, aim for a shutter speed above 1/500th of a second or faster. Your ISO and aperture will come into play, but if you want detail in the water, faster is better. A tripod is a must to keep your camera steady with slow shutter speeds. Next, play with your shooting angle. Get low to make waves loom larger or shoot from above to capture their patterns. Timing is everything. Watch the waves and click the shutter right before they break for the most dramatic effect. Lastly, don't fear getting a bit wet. Sometimes, the best shot needs you to be in the action. Remember, keep experimenting with these tips to nail the perfect wave motion shot.
Editing Techniques to Enhance Beach Landscape Photos
When you've clicked your beach landscape photos, editing is your secret weapon to make them pop. First things first, always shoot in raw format. This gives you the most data in your photo, meaning more control during editing. Use software like Adobe Lightroom or Photoshop. Play with the exposure to get light just right. Beach photos often need a brightness boost, but don't overdo it, or you'll lose detail. Contrast is your friend. It makes colors stand out. Crank it up a bit for vivid blues and whites but keep an eye out for unnatural skin tones if people are in your shot. Saturation and vibrance adjustments can make your blues deeper and your sunsets more dramatic. However, a little goes a long way. Over-saturation can make your photo look fake. Finally, don't ignore the power of cropping. It can turn a good photo into a great one by focusing the viewer's attention and improving composition. Remember, the goal is to enhance, not completely alter, the beauty of your beach landscapes.
Conclusion: Bringing It All Together for the Perfect Shot
In wrapping this up, the aim is simple: bag that perfect beach landscape photo you’ve been dreaming about. Remember, it's not just about snapping away with your camera. You've got to plan. Watch the weather, pick the right time for that soft, magical light, and set up your shot with a keen eye on composition. Use those leading lines and the rule of thirds to your advantage. And don't forget, experimenting with different settings can lead to astonishing results. Finally, bring your unique touch to the photo. Your perspective is what will make that shot stand out. So, gear up, hit the beach, and let the magic unfold through your lens.
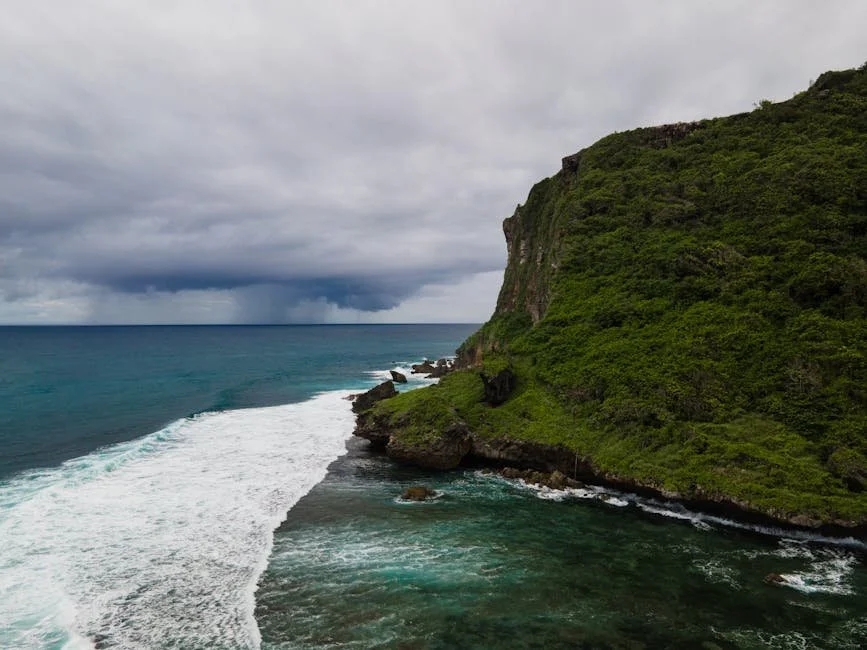
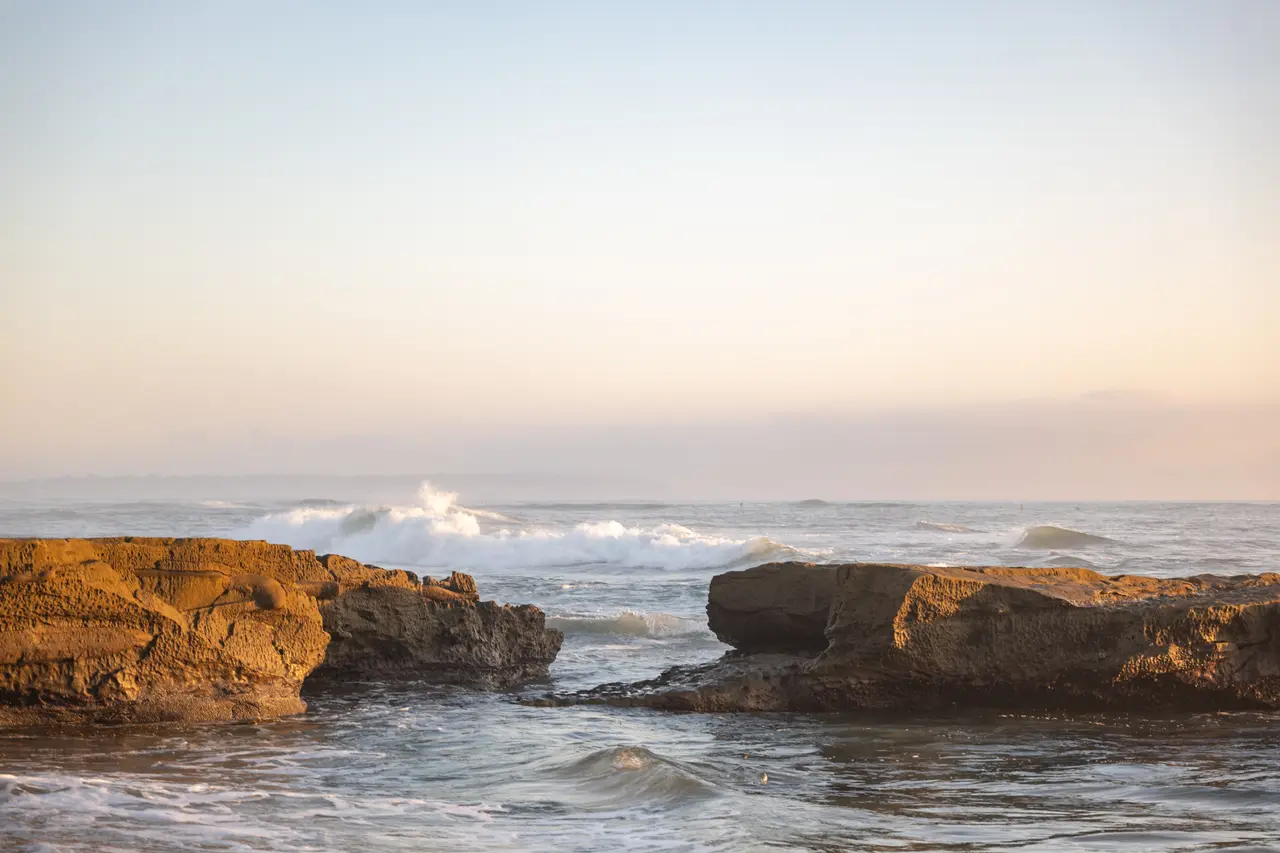
Exploring the Beauty of Ocean Landscapes with Coastal Photography
Introduction to Coastal Photography
Coastal photography captures the raw beauty of where the land meets the ocean. It's about more than just taking pictures of the beach. This genre focuses on showcasing elements like crashing waves, rugged cliffs, sandy shores, and the interplay of light and shadow during different times of the day. A key aspect of coastal photography is its ability to convey the vastness and dynamic nature of the coastline. Whether it's the peaceful serenity of a sunset or the powerful force of a storm brewing over the ocean, each photo tells a story. To get started, you don't need the fanciest equipment. A basic camera and a passion for exploring the edges of the land are your primary tools. Remember, the best coastal photographs often come from understanding the tides, weather, and lighting—factors that can dramatically change the mood and composition of your shots. So, dive in, explore the coastlines, and capture the magic of the shores in your own unique way.

The Allure of Ocean Landscapes
The ocean has a magic that pulls us, a vast expanse of mystery and power that never fails to captivate. Photographing the ocean isn't just about capturing water; it's about seizing moments of tranquility, fury, and endless horizons that speak to our very core. The allure of ocean landscapes lies in their dynamic nature. One moment, the sea is calm, reflecting the serene sky. The next, it roars with waves crashing against the rocks, displaying raw power. This ever-changing face of the ocean offers photographers an infinite canvas of moods and scenes to capture. Whether it's the soft pastel hues of a coastal sunrise, the golden shimmer of a beach at sunset, or the haunting beauty of a stormy sea, ocean landscapes hold the power to evoke deep emotions. And it's not just about the water; it's about how the water interacts with the land, the sky, and the light. Coastal photography tells stories of nature's dance, of wind, water, and land coming together in a spectacular display of beauty. The allure lies in its unpredictability, its undeniable beauty, and the challenge it poses to photographers to immortalize a moment that will never be quite the same again.
Essential Gear for Coastal Photography
To capture the beauty of ocean landscapes, you don't need an arsenal of gear, but a few essentials will make a big difference. First, a sturdy tripod is non-negotiable. Coastal winds can be unpredictable, and a tripod ensures your camera stays stable for those crystal-clear shots. Next, consider a camera with good dynamic range to capture the vast difference in light between the sky and the sea. A wide-angle lens is your friend here, letting you encompass the grandeur of the coast in a single frame. Don't forget a polarizing filter to cut through the glare on the water and boost the blues and greens of your scene. Lastly, a waterproof or water-resistant camera bag will protect your equipment from unexpected splashes or rain. With these in your kit, you're well-equipped to capture the coastal beauty.
Best Times for Capturing Coastal Beauty
When you're aiming to snag breathtaking coastal shots, timing isn't just a small detail—it's everything. Early morning and late afternoon are the golden windows. Right after sunrise, the light is soft and gentle, perfect for capturing the serene beauty of the beach without harsh shadows. This is when you catch the coastline waking up, with soft hues painting the sky and water. Late afternoon, leading into the sunset, is your next golden ticket. The sun dips, colors explode across the sky, and the water reflects these spectacular scenes. Plus, these times usually mean fewer people cluttering your shots, giving you clean, unspoiled views. In simple terms, to capture the coast in all its glory, aim for when the sun is low. These hours, known as the golden hours, will reward you with the best light and colors.
Composing Your Coastal Shots: Tips and Techniques
When you're standing before the vast beauty of the coast, capturing its essence takes more than just a quick snap. Let's dive into some simple yet effective tips to elevate your coastal photography. First, think timing—early morning or late afternoon offers the best light. This golden hour makes the sea shimmer and gives your photos a warm, inviting glow. Next, play with perspectives. Get low for dramatic foregrounds with rocks or tide pools, or find a high vantage point for sweeping views. Pay attention to your composition. Rule of thirds works wonders; position the horizon off-center for interest. Look for leading lines—the curve of the waves or a path through the sand can draw the viewer in. Don't forget to capture the mood. Stormy skies bring drama, while calm waters convey peace. Each tells a different story of the coast. Experiment with shutter speeds. A fast shutter freezes the motion of crashing waves, while a slower speed creates a smooth, dreamy effect for moving water. Always, keep an eye on your surroundings—not just for safety but for unexpected moments of beauty. These tips aren’t hard rules but starting points. The coast is ever-changing, offering new stories to tell through your lens each time you visit.
Understanding Light and Weather in Coastal Photography
To nail those stunning coastal shots, you've got to get chummy with two things: light and weather. First up, light. Dawn and dusk are your best buds for coastal photography. This magic hour, or golden hour, casts a warm, soft light that makes everything look better. During mid-day, when the sun's at its peak, light can be harsh and create unwanted shadows, so it's often best to avoid snapping photos then. Weather plays a huge role too. Overcast days can help diffuse the light, cutting down on glare and giving your photos a moody vibe. Also, don't shy away from shooting in fog or after a storm. The aftermath of weather events can create some seriously dramatic scenes, perfect for capturing the raw beauty of the coast. Remember, understanding how light and weather interact can turn your coastal photography from good to breathtaking.
Iconic Locations for Coastal Photography
When it comes to coastal photography, finding the right spot matters just as much as timing and skill. Some places have a magic touch that brings photos to life. Let's talk about these iconic locations, sure to make your coastal photography stand out. First, the Great Ocean Road in Australia offers breathtaking views with its towering rock formations and vast ocean vistas. It's a paradise for photographers. Then, there's Big Sur in California. The dramatic coastline mixed with the misty air creates a surreal experience. Another gem is the Amalfi Coast in Italy, known for its colorful villages perched on cliffs, offering a beautiful contrast against the deep blue sea. Don't forget about Lofoten Islands in Norway, where the Northern Lights meet the sea, a spectacle unlike any other. Each of these places provides a unique backdrop that can turn a simple photo into a masterpiece. So, pack your bags and your camera. These locations won't disappoint.
Challenges of Coastal Photography and How to Overcome Them
Coastal photography is stunning but comes with its own set of challenges. First off, the light near the ocean can be tricky. Bright sunlight can cause harsh shadows and overexposed shots. To beat this, aim for the golden hours—just after sunrise or before sunset. This light is softer and gives your photos a warm, magical glow.
Next up, the weather. It changes fast by the coast. One minute it’s sunny, and then fog rolls in. Always check the weather forecast before heading out. But also pack your gear with this in mind. A weather-sealed camera bag and lens cloths are essentials to protect your equipment.
Saltwater and sand? They're not friends with your gear. Always keep your camera in a protective case when not in use. And never change your lenses on a windy beach. If sand gets into your camera, it can spell trouble.
Lastly, dealing with the vastness of the ocean and sky can make compositions challenging. Finding a focal point is key. Rocks, boats, or even footprints in the sand can draw the viewer’s eye. Play with angles and perspectives to make your photos stand out.
Remember, coastal photography may test your patience, but it’s incredibly rewarding. Keep these tips in mind, and you’ll be capturing the beauty of the ocean landscapes like a pro.
Post-Processing Techniques for Coastal Images
When it comes to coastal photography, capturing the shot is just the beginning. The real magic often happens during post-processing, where you can truly bring out the beauty of the ocean landscapes. Basic adjustments you should consider include enhancing colors to make blues deeper and sunsets more vibrant, adjusting contrast to add depth, and sharpening to bring out details. Don't shy away from experimenting with exposure adjustments to get the perfect balance between light and shadow, especially for shots taken during tricky lighting conditions like sunrise or sunset. Another game-changer is the use of gradients to subtly enhance the sky or the sea without making the image look unnatural. Remember, the goal is to enhance, not drastically change, the natural beauty of the coastal scene you've captured.
Sharing Your Coastal Photography: Platforms and Communities
When it comes to sharing your coastal photography, picking the right platform makes all the difference. Social media sites like Instagram and Facebook are great for reaching a wide audience. They're easy to use and let you tag your photos with hashtags related to coastal photography. This way, you can attract viewers who are specifically interested in ocean landscapes. Another high-impact option is Flickr, where a strong community of photography enthusiasts gathers. Flickr allows for higher resolution images, which is perfect for showcasing the intricate details of your coastal shots.
Don't overlook photography forums and websites like 500px. These platforms connect you with professional and amateur photographers alike. Here, you can receive constructive feedback that can help improve your skills. Plus, being part of such communities often opens up opportunities for collaborative projects or exhibitions.
Finally, consider starting a blog or a website dedicated to your photography. This can serve as your portfolio, giving you complete control over how your work is displayed. Plus, it's a fantastic way to tell the stories behind your coastal adventures, adding depth to your images.
Remember, the goal is to find platforms that not only showcase your work but also connect you with others who share your passion. So, dive in, share your perspective of the ocean's beauty, and engage with the coastal photography community.

Transforming Spaces with the Magic of San Diego Seascape Wall Art
Introduction to San Diego Seascape Wall Art
San Diego seascape wall art captures the essence of the ocean’s beauty, showcasing the vibrant colors and dynamic moods of the sea. These pieces feature stunning representations of San Diego's beaches, sunsets, and coastal wildlife, bringing the calm and serenity of the ocean into your home or office. Artists often focus on the unique light and atmosphere of the San Diego coast, creating art that feels alive with the sights, sounds, and even the scent of the sea breeze. Whether it’s a painting, a photograph, or a mixed media piece, San Diego seascape wall art is about more than just decoration. It’s a gateway to a serene coastal experience, a way to keep the soul of the beach close, even when you're miles away from the sand and surf.
How Seascape Wall Art Enhances Any Room
Seascape wall art from San Diego does more than just fill a blank space on your wall—it transforms your room. Here's how. First, it brings a piece of the calm and serenity of the ocean into your home. Imagine coming home after a long day, and you’re immediately greeted by the tranquil blues and ethereal whites of a San Diego shoreline. It's instant stress relief. Next, this art form adds a unique character to any room. Whether it's your living room, bedroom, or even bathroom, a carefully chosen seascape can complement the room's theme or contrast it interestingly, making everything look more thought-out and designed. Lastly, seascape wall art acts as a conversation starter. Guests will be drawn to the vibrant colors and possibly the story behind the piece, sparking interesting discussions. So, adding a piece of San Diego's coasts to your walls does more than just decorate them; it breathes life into your home.
The Beauty of San Diego's Coastline in Art
The San Diego coastline is more than just miles of sand and water; it's a canvas that captures the heart of the city. When artists look at San Diego's coastline, they see waves that dance under the sun, cliffs that stand proudly against the crashing surf, and sunsets that paint the sky in hues of orange and purple. This beauty is what makes San Diego seascape wall art so captivating. It's not just a picture on a wall; it's a window to an experience, a moment frozen in time that brings the essence of the beach into your space. Whether it's a vibrant photo print that energizes a room or a soothing painting that brings peace, having a piece of this art in your home means you're always just a glance away from the magic of San Diego's shores. Artists adept at translating this coastal charm into art ensure that each piece not only stands out visually but also evokes the emotions tied to the seaside. So, when you bring a piece of San Diego seascape wall art into your space, you're not just decorating; you're transforming your environment with the spirit and beauty of the California coast.
Choosing the Right Seascape Wall Art for Your Space
When you're diving into the sea of seascape wall art to splash your space with San Diego's coastal beauty, picking the right piece is key. Think about the vibe of your room. Want a tranquil retreat? Go for serene, soft-hued seascapes. After a vibrant punch? Bold, sunset scenes pack that. Size matters too. A huge wall? Big art makes a statement. Tiny space? A smaller piece keeps it cozy. Remember, the frame's part of the game. Sleek, minimal frames modernize, while chunky, wooden ones add rustic charm. And light plays a role. Natural light brings out the best in most seascapes, enhancing colors and details. Ultimately, choose what you love, something that captures the essence of San Diego seas and speaks to you. That’s the true magic of transforming your space.
The Emotional Impact of Seascape Wall Art
San Diego seascape wall art does more than just brighten a room. It brings the calming and rejuvenating vibes of the ocean into your living space. Imagine the soothing sounds of waves and the serene blue of the ocean captured on your wall. It's not just about the aesthetic appeal; it's about how it makes you feel. This art form is known for reducing stress and boosting mood, creating a tranquil oasis in your home or workplace. When you gaze at a piece of seascape wall art, it's like taking a deep breath of fresh, ocean air. It promotes relaxation and can even inspire creativity and productivity by reminding us of the beauty and vastness of the natural world. So, incorporating a slice of the San Diego coastline into your décor does more than just decorate—it transforms your environment into a space of peace and inspiration.
Incorporating San Diego Seascape Art in Various Design Styles
San Diego seascape art isn't just pretty pictures of the ocean. It's a versatile tool for bringing the essence of the coast into your home, no matter your decor style. Let's break it down. Modern minimalist? Think simple frames with bold, broad views of the Pacific. It adds breath without clutter. Bohemian? Layer textures and colors. A vibrant San Diego sunset adds depth. Coastal? Obvious match. Soft blues, sandy beiges, and art that feels like the beach belongs. Industrial? Yes, it works here too. Choose shots with rugged cliffs or a stormy sea to match that raw, edgy vibe. Traditional homes benefit from classic framed seascapes, adding elegance and calm. So, whatever your style, there's a piece of San Diego's coast ready to enhance your space.
Tips for Displaying Seascape Wall Art Effectively
When adding San Diego seascape wall art to your space, consider these tips to maximize its impact. First, lighting is key. Place your art where it can catch natural light, or add focused lighting to highlight its beauty. Next, think about the wall color. Light or neutral walls make seascapes pop, bringing the ocean's calmness into your room. Size matters too. Larger pieces create a focal point, while smaller ones complement an existing decor theme. How high you hang the art makes a difference. Eye level is usually the best, providing an immersive experience. Remember, the aim is to make your space feel like an extension of the San Diego coast, transforming it with the art's magic. Keep these tips in mind, and you'll enhance your living space beautifully.
Where to Find San Diego Seascape Wall Art
Finding San Diego seascape wall art is easier than you think. Start with local art galleries in San Diego; they often feature works by local artists who capture the city's stunning coastal views. Next, hit up art festivals and outdoor markets. Places like the La Jolla Art & Wine Festival or the Little Italy ArtWalk are goldmines for finding unique pieces directly from the artists. Don't forget about online platforms, either. Websites like Etsy and Fine Art America allow you to search for San Diego seascapes by local artists from the comfort of your home. Plus, many artists have their own websites and social media pages where they sell their art. Whether you want a vibrant sunset over the Pacific or a serene morning at Coronado Beach, tapping into these sources will get you that perfect piece of San Diego seascape wall art.
Caring for and Maintaining Your Seascape Wall Art
To keep your San Diego seascape wall art looking as fresh as the day you got it, simple but consistent care is key. First, hang your artwork away from direct sunlight. The sun's rays can fade the vibrant blues and greens that make these seascapes so stunning. Next, dust it lightly. Use a soft, dry cloth and gently wipe the surface to avoid scratching the art. If your piece is framed behind glass, a bit of glass cleaner on the cloth can help keep the view to the ocean clear. Avoid harsh chemicals on the artwork itself, though. Humidity is another enemy. In places with high moisture, consider a dehumidifier to protect the art from warping or the colors from smudging. Lastly, if you ever need to move your art, handle it with care. Wrap it in something soft to protect it from scratches and knocks. This way, your San Diego seascape will continue to transport you to the coast with its beauty for years to come.
Transforming Your Space: A Summary and Reflection on Seascape Art
Seascape wall art, especially from San Diego, has a unique way of transforming any room. It brings a piece of the ocean's serenity and majesty right into your space. Imagine the calming blues and dynamic waves on your wall. This art doesn't just decorate; it changes how you feel in a room. It's about bringing the outside world in. You get this fresh, open vibe, like a window to the ocean, making small spaces feel bigger and darker rooms brighter. Plus, it's a chance to reflect. Each piece tells a story—maybe of a storm weathered or a serene sunset. It's more than art; it's about connection. To the sea. To peace. To stories untold. Whether it's a vibrant capture of the beach at sunset or a stormy, wave-crashed shore, these pieces make you pause and feel something deeper. It's not just about having a pretty picture; it's about the mood it sets, the thoughts it inspires, and the breath of fresh air it brings into your life.
The Art of Wave Photography: Tips From a San Diego Expert
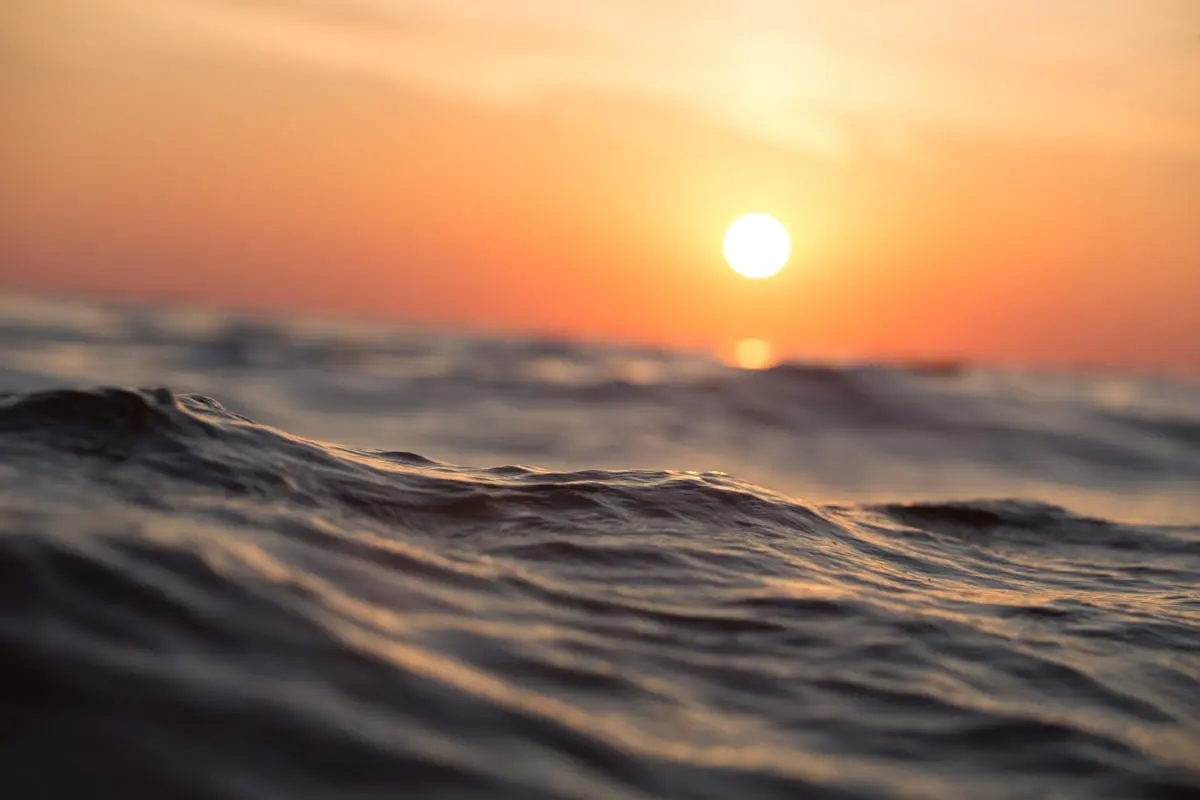
Introduction to Wave Photography
Wave photography captures the ocean's power, beauty, and continuous motion, making it a fascinating subject for photographers. It transcends merely taking pictures of water. Instead, it involves understanding light, timing, and perspectives to truly bring a wave's character to life. Here’s the deal: you don't need to be a pro or have the fanciest camera to start. What matters is your passion for the sea and your willingness to learn and adapt. This introduction to wave photography will guide you into starting your journey, focusing on the basics like choosing the right equipment, finding the perfect timing, and adopting essential techniques. Keep in mind, practice makes perfect. So, grab your camera, and let’s dive into the world of wave photography.

Understanding the Basics of Wave Photography
Wave photography is all about capturing the ocean in its wildest form. It's freezing a moment that shows the power, beauty, and ever-changing mood of the sea. To start, you'll need a camera that can handle getting a bit wet, and a fast shutter speed is your best friend. It helps freeze the waves in action. A waterproof camera or a water housing for your camera is a smart investment. Lighting is crucial. Early morning or late afternoon, when the sun is low, gives your photos that golden glow. Play with angles. Get down low to make the waves look larger than life or shoot from above for a bird's eye view. Patience is key. Not every wave is photo-worthy. Wait for the right one and then snap away. Remember, it’s not just about the gear or the perfect wave; it’s seeing the ocean through your lens and sharing its story with the world.
Best Time and Season for Wave Photography in San Diego
To nail wave photography in San Diego, timing is everything. The best time to capture stunning wave shots? Early morning or late afternoon. These times offer the golden hour light that photographers dream of, creating a magical glow on the water. Seasons matter too. Winter and fall, believe it or not, are your friends here. These months bring the Pacific's mightiest swells to San Diego's shores. So, to get those dramatic wave photos, aim for a session between November and February. The crowds are thinner, and the waves are at their most impressive. Keep your gear ready, check the surf forecast, and don’t forget that patience is key. Sometimes, the perfect shot takes time.
Essential Gear for Capturing the Perfect Wave
To nail that breathtaking wave shot, you'll need more than just a good eye. Your gear plays a huge role. At its core, you'll want a sturdy camera designed to handle the rough and tumble of the beach environment. Waterproof is the word here, whether it’s a protective case for your existing camera or one built to brave the elements. A DSLR or mirrorless camera tends to be the go-to for clarity and quality, but don't overlook action cams; they're built for this. Next, invest in a telephoto lens. Waves won't wait for you to get close. This lens lets you zoom in from a safe distance, capturing the drama without getting drenched. A tripod is crucial, too. It’s not just for stability; it’s your best friend against the wind. And yes, memory cards. Lots of them. High capacity, because high-resolution shots eat space like nothing. Lastly, don't forget the cleaning kit. Sand and salt can do a number on your gear. Keep it clean, keep it running. With this setup, you're well on your way to capturing waves that steal breaths.
Camera Settings for Wave Photography: A Beginner's Guide
Getting the right camera settings is crucial to capturing the power and beauty of waves. Let's break it down simple. First, you want to freeze that action, right? So, crank up your shutter speed. Try starting at 1/1000th of a second. This high speed catches the wave in a crystal-clear standstill. Now for aperture, it depends on your focus. Want the wave sharp and the background a blur? Open that aperture wide, something like f/4 should do the trick. But, if you're aiming for everything in focus, you'll need to narrow it down to about f/16. Lastly, let's talk ISO. Start low, like ISO 100 or 200. Low ISO keeps the noise down and your shot smooth. But if your photo's too dark because of a speedy shutter or a narrow aperture, don't be shy to push that ISO up until you get the right balance. Remember, mastering these settings won't happen overnight. Each wave and each day is different. Keep practicing, and you'll get the hang of capturing those epic wave shots.
Composition Techniques for Dynamic Wave Photography
To nail the perfect wave shot, start by understanding composition—a game-changer in photography. First up, rule of thirds. Imagine your view divided into nine equal parts by two horizontal and two vertical lines. Place interesting parts of the wave where these lines intersect for a balanced photo. Next, embracing leading lines. Waves themselves or the shoreline can guide the viewer’s eye through the picture, adding depth. Don’t forget about framing; use elements like rocks or piers to encase your wave, focusing attention. Contrast and lighting matter too. Early morning or late afternoon offers the best natural light for highlighting the wave's textures and colors. Experiment with angles; shooting from a high vantage point gives a grand perspective, while getting close can capture the wave's power. Each technique brings a unique vibe. Mix, match, and see what unfolds. Remember, practice makes epic wave shots.
Light and Its Impact on Your Wave Photographs
Wave photography isn't just about timing and having a keen eye; light plays a pivotal role that can either make or break your shot. Early morning and late afternoon are the golden hours for photographers, not just for their softer light but for the dramatic shadows and rich textures they can cast on the waves. Direct midday light can be harsh, flattening the depth and detail in your shots. It's also worth considering the direction of light. Side lighting can enhance the waves' texture, while backlighting from a setting or rising sun can silhouette the wave, highlighting its shape against the lit sky. The intensity and angle of light change with the time of day and weather conditions, affecting the color and contrast in your photographs. To capture the ocean's true essence, experiment with these varying light conditions and watch your wave photography transform from simple snapshots to breathtaking masterpieces.
Tips for Safety and Respect While Shooting Waves
When shooting waves, always remember the ocean is powerful and unpredictable. Here are straightforward, general tips to stay safe and show respect while capturing the beauty of the waves. First, never turn your back on the ocean. A surprise wave can knock you down. Second, if you are first starting out, consider beginning with a zoom lens to keep a safe distance from the water. This way, you can capture stunning shots without risking your gear or yourself. Third, take time to learn the tides and weather conditions of your location. Check the local tide charts and weather forecasts to avoid getting caught in dangerous situations. Lastly, respect the environment and local communities. Stay off private property, and don't disturb the wildlife or leave trash behind. By following these tips, you can enjoy capturing the power of the waves while keeping yourself safe and respecting the beauty of nature.
Post-Processing Tips to Enhance Your Wave Photos
After you've captured the raw beauty of the waves, the real magic happens in post-processing. This is your chance to bring out the very best in your wave photos. First off, never overlook the basics of adjusting contrast and brightness. These tweaks can make your photo pop by enhancing the deep blues of the sea and the sparkling whites of the waves. Also, play around with saturation—just a bit—to make the colors true to life or even a tad more vibrant. Remember, subtlety is key; you don’t want the colors to look fake. Sharpening is your next tool. It can bring out the textures in the water, from the frothy tops of waves to the smooth surfaces in between. But like with spices in cooking, too much can spoil the dish. A light hand will serve you well. For those who want to go a step further, consider using filters or effects that can mimic the golden glow of sunrise or sunset, adding a warm, golden tone to your images. This not only enhances the emotional appeal of your photo but can also emphasize the dynamic shapes and movements of the waves. There’s no one-size-fits-all approach here; it’s all about experimenting and finding what works best for each unique shot. With practice, your post-processing skills will become as integral to your wave photography as catching the perfect wave.
Conclusion: Continuing Your Journey in Wave Photography
Mastering wave photography is a journey, not a destination. Remember, every pro was once a beginner. Your progress will depend on how much you're willing to learn and adapt. Embrace the unpredictability of the sea, and use it to fuel your creativity. Keep experimenting with different times of the day, camera settings, and angles. Most importantly, don't be discouraged by failure. Each misstep is a stepping stone to capturing that perfect wave. San Diego, with its vast coastline, provides endless opportunities for wave photographers. So, grab your camera, hit the beaches, and let the ocean be your muse. Keep pushing your limits, and you'll see your skills surf to new heights.
san diego surf photography
Introduction to San Diego Surf Photography
If you are just finding this blog, here is a quick reference intro into shooting surf around San Diego:
San Diego's surf images ignite the excitement of coastal sports, framed by gorgeous sunsets and pristine waves. It's a niche brimming with passion, thrill, and San Diego's vibrant surf culture. Dreaming of landing that cover shot or immortalizing the ocean's beauty? Master the essentials. Timing, ocean savvy, and adept camera skills in demanding conditions are your trifecta for success. Arm yourself with a weather-sealed camera, anticipate the surfer's maneuvers, and embrace the spray. With its expansive shoreline, San Diego is a haven for photographers itching to snap surfers in motion.

Best Beaches in San Diego for Surf Photos
San Diego's coast is a paradise for surf photographers, with its mix of dynamic surf spots and picturesque views. Among the best, La Jolla Shores stands out for its serene mornings and vibrant sunsets, creating perfect lighting for any shot. Pacific Beach offers a classic California surf vibe, busy and alive, ideal for capturing surf culture in action. Then there's Ocean Beach, where the long pier provides a unique perspective of surfers against the backdrop of an open ocean. Windansea Beach is a must-visit for those seeking dramatic waves and skilled surfers in action-with absolute discretion, of course. Lastly, Blacks Beach not only offers some of the biggest swells for high-action shots but also stunning cliffs as a backdrop, offering both adrenaline and tranquility in one frame. Each of these beaches has its own charm, catering to various photography styles and preferences. Whether you're after action shots or serene landscapes, San Diego’s coastline won’t disappoint.
Essential Gear for Capturing the Perfect Surf Shot
To capture stunning surf shots, having the right gear is essential. Start with a camera that is rugged enough to withstand the beach environment and fast enough to capture quick movements. If you are just starting out, be sure to experiment with different focal lengths--a telephoto lens to zoom in on distant surfers without getting too close to the action is a great place to start as you get comfortable with learning this craft. It's crucial to invest in a waterproof case or housing to protect your camera from saltwater damage. Additionally, for striking underwater and above-water shots, consider housings with a dome port attachment. A reliable tripod can help stabilize your shots, while a drone offers a unique perspective from above. In summary, prioritize a durable camera, telephoto lens, waterproof protection, optional dome port, and a stable tripod or drone for capturing the beauty of the surf.
Tips for Beginners in Surf Photography
Starting surf photography is thrilling but can feel like you’re trying to catch a wave with a camera – tricky but not impossible. Here’s how to dive in. First, know your gear. You don’t need the most expensive setup, but a waterproof camera or a good quality water housing for your camera is a must. Understand your camera settings; play with shutter speed to capture crisp action shots or create that smooth, blurred motion effect. Second, practice your timing. Surfing is fast. Work on snapping shots at just the right moment. This means lots of watching and waiting. The perfect wave and move can happen in a blink. Third, understand the ocean. Respect the power of the sea. Learn how tides, lighting, and weather change the game. Early morning and late afternoon offer the best light for that golden shot. Lastly, safety first. Always keep an eye on your surroundings. Don’t get so lost in your lens that you miss an approaching wave or surfboard. Happy shooting!
Understanding the Best Lighting for Surf Photography
When it comes to nailing the perfect surf shots, lighting isn't just important; it's everything. The magic happens early in the morning or late in the afternoon. Why? That's when the sun sits low in the sky, casting golden hues and long, dramatic shadows. This time is often called the "golden hour" and for good reason. The soft, warm light enhances the water's textures and the surfer's details, making your photos pop with a natural, vibrant look.
But beware of midday light. It's harsh, creating strong contrasts and stark shadows, which can flatten the depth and details of your image. While it's not impossible to shoot during this time, it's tricky and usually not worth the hassle if you're looking for those breathtaking shots.
Also, consider the direction of the light. Side lighting can emphasize texture and movement, adding drama to your photos. Backlighting, where you shoot towards the sun, can create a stunning silhouette effect but requires skill to manage exposure and avoid lens flare.
Remember, in surf photography, patience is a virtue. Sometimes, waiting for that perfect lighting condition means getting the shot that stands out. So, watch the weather, plan your sessions around the golden hours, and always be ready to capture the beauty of the surf.
Capturing the Action: Techniques for Shooting Surfing
Shooting surf photography in San Diego means getting up early and catching the golden hour light. First tip, always keep your eyes on the waves; they’re unpredictable. Use a fast shutter speed to freeze the action, something like 1/1000th of a second or faster. This will help you capture surfers in crisp detail. A telephoto lens is your best friend here; it lets you get close to the action without getting wet. Aim for a lens that reaches 200mm or more. Remember, lighting is key. Early morning or late afternoon offers the best natural light for capturing those epic surfing shots. Play with angles too. Don't just shoot from the beach; try different perspectives. Maybe find a spot on a pier or cliff. This adds variety to your shots. And finally, keep it fun. Surfing is all about the thrill, the vibe. Let your photos show that. Keep experimenting, and you'll get some stunning captures that really bring the energy of San Diego’s surf scene to life.
Editing Your Surf Photos for Maximum Impact
Editing surf photos is crucial for capturing the raw power and beauty of the ocean waves. First things first, always shoot in RAW format. This gives you more control when you're tweaking the photo later. When you sit down to edit, adjust the exposure to make sure the wave and the surfer stand out. You might need to brighten the image or pump up the contrast. Colors are key in surf photography. Boosting the blues can bring the ocean to life, but remember, keep it real—too much editing can make your photo look fake. Sharpening is your friend but use it wisely. It can make the water droplets look crisp and the surfer's movements more dynamic. Crop the picture to focus on the action. Sometimes, less is more, and removing distractions from the edges can highlight the surfer's daredevil moves. Lastly, play with the highlights and shadows to give your photo depth. Surf photography is all about feeling the moment, and with these simple edits, your photos will make viewers feel like they're riding the waves with you.
How to Stay Safe While Shooting Surf Photography in San Diego
When shooting surf photography in San Diego, safety is key. First, always keep an eye on the ocean. The sea is unpredictable, and waves can change quickly. Stay aware of your surroundings. Second, wear a life jacket if you're getting into the water. It's a simple step that can save your life. Third, know your limits. Don't push yourself too far into the ocean if you're not a strong swimmer. Fourth, protect your gear. Use a waterproof case for your camera to avoid any accidents. Lastly, respect the surfers. Keep a safe distance to avoid interfering with their ride. Following these tips will ensure you enjoy capturing the beauty of San Diego's waves without risking your safety.
Creating a Portfolio of Your San Diego Surf Photography
Creating a portfolio of your San Diego surf photography is like packing your suitcase for an epic adventure. You want to show off the best you've got. Start by picking your top shots. Think about those big waves, surfers catching air, and the sun setting over the ocean. Mix it up with close-ups and wide shots to give a full picture of the San Diego surf scene. Remember, quality beats quantity. A few stunning photos are better than a bunch of okay ones. Next, think about how you tell a story with your photos. Arrange them in an order that feels like a journey from dawn patrols to sundown sessions. If you've got shots that show a surfer's progress or changing weather patterns, use them to add depth to your story. Now, where are you going to show off your portfolio? Online is a great start. Use social media or a personal website. But don't shy away from printing a few photos. There's something special about holding a physical photo. Lastly, keep updating your portfolio. Your latest shot might be your new best. This way, your portfolio grows with you, capturing more epic moments of San Diego's surf scene.
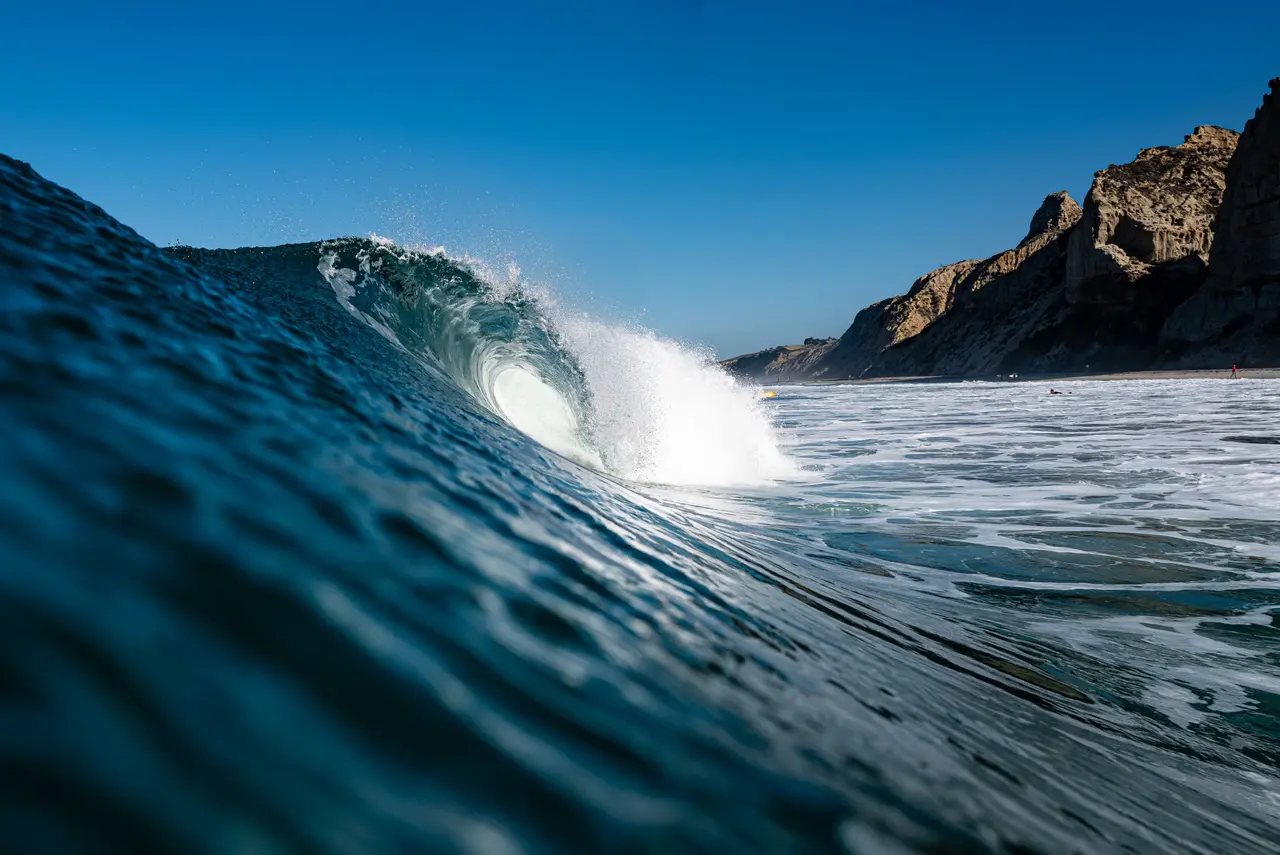
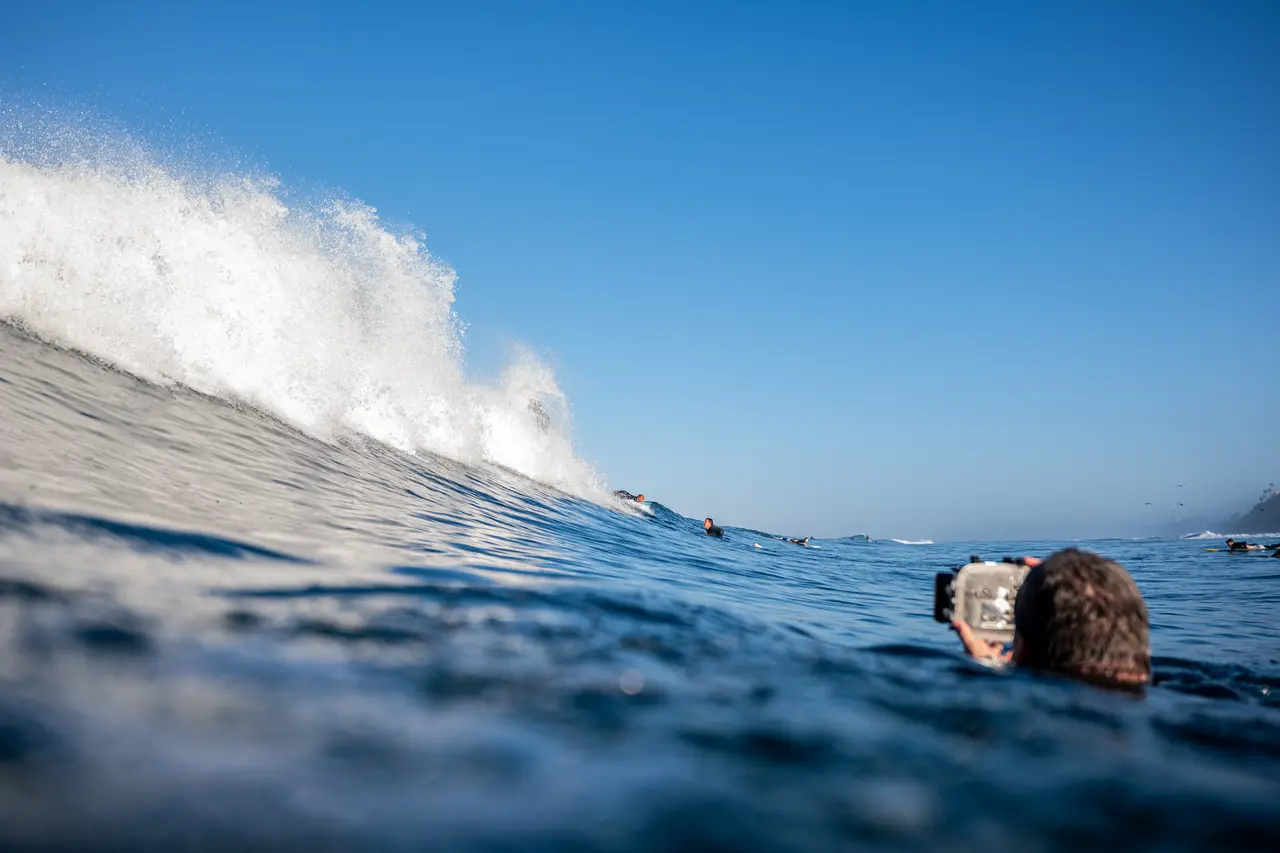
Wave Photography: Behind the Lens with San Diego's Surf Culture
Introduction to Wave Photography: Capturing the Ocean's Majesty
Wave photography isn't just about snapping pictures; it's an art form that dives deep into the heart of the ocean's majesty, capturing moments that tell stories about the sea's ever-changing nature. San Diego, with its vibrant surf culture, presents a canvas unlike any other. Each wave here tells its own story, from the calm mornings with gentle waves kissing the shore to the wild evenings when the ocean roars. This type of photography demands more than just good camera gear. It requires patience, skill, and a profound love for the sea. You learn to read the waves, understand the best time for capturing their raw beauty, and most importantly, respect the ocean's power. Whether you're aiming to freeze a moment of a towering wave seconds before it crashes or seize the serene beauty of a wave curling at sunrise, it's all about timing and perspective. Wave photography in San Diego is not just about taking a picture; it's about capturing a feeling, a story, and the untamed spirit of the surf culture. So, whether you're a seasoned photographer or just starting, remember, every wave is different, and there lies the challenge and thrill of wave photography.

The Essentials of Wave Photography Gear
To dive into wave photography, you don't need a boatload of gear. Start with a solid camera that can handle a bit of saltwater spray. Waterproof or water-resistant features are a big plus. Next up, a lens with a long reach, like a telephoto, lets you zoom in on the action from the shore. Image stabilization will save your shots from being blurry. Don't forget a durable tripod for stability and a protective bag because sand and water are not your friends. Finally, consider a waterproof housing if you plan to get up close with the waves. This setup keeps it simple and focuses on what's truly important – capturing the raw beauty of the surf culture in San Diego.
Understanding San Diego's Unique Surf Culture
San Diego's surf culture is more than just catching waves; it's a lifestyle rooted deep in history and community. In San Diego, surfing isn't just for the pros or the fearless. It welcomes everyone, from those stepping on a board for the first time to the old timers who've been riding the waves since the dawn of the surf scene. This inclusivity breeds a special kind of camaraderie you're hard-pressed to find anywhere else.
Local surf shops dot the coastline, serving as hubs for both gear and gossip. Here, tales of epic swells and secret spots are passed around like precious currency. And when the conditions align, it's not just the surfers who hit the beaches; photographers, families, and curious spectators flock to the sandy shores to witness the harmony of human and wave.
What truly sets San Diego apart is its diverse range of surf spots, catering to all levels of skill and bravery. From the gentle rollers perfect for beginners at La Jolla Shores to the challenging barrels at Black's Beach, San Diego has a wave for every surfer. This variety, along with the mild weather year-round, makes the city a surf haven.
Embedded in this surf culture is a respect for the ocean and a commitment to preserving its beauty. Surfers lead beach cleanups and conservation efforts, ensuring the waves they cherish remain unspoiled for generations to come. It's this blend of passion, community, and environmental stewardship that makes San Diego's surf culture truly unique.
Techniques for Capturing the Perfect Wave Shot
Getting the perfect wave shot isn't just about pointing your camera at the ocean and clicking the shutter. It's about knowing when to snap the picture, where to stand, and what settings to use on your camera. First off, timing is everything. You want to catch waves as they are about to break, creating that moment of tension and beauty. Early morning or late afternoon, when the sun angles add drama to your shot, is ideal. Positioning matters too. Being at the right place can mean getting wet, so don't be scared to stand where the waves break. This is where the magic happens. As for camera settings, go for a fast shutter speed to freeze the wave in motion, something like 1/1000th of a second. But, remember to adjust according to the light. Aperture and ISO settings will vary based on your desired depth of field and the time of day you're shooting. Oh, and a sturdy tripod can be your best friend, especially in windy conditions or if you're capturing the waves' motion with a slower shutter speed. To sum it up: time it right, don't be afraid of a little water, play with your camera settings, and keep that tripod handy.
Timing and Patience: The Key to Successful Wave Photography
Catching a wave through the lens isn't just about snapping away. It requires timing and patience, a lot more than you might think. To nail that perfect shot, the one that captures the power and beauty of a wave, you've got to learn the rhythm of the sea. It's about waiting for the right moment, which often means early mornings or late afternoons when the light is golden and the crowds are thin. These are the magic hours when the ocean seems to perform just for you. But remember, it's not just about showing up; it's about being ready and willing to wait. Sometimes, the sea tests your patience, and that perfect wave might take hours or even days to appear. Good wave photography involves understanding the weather and wave patterns too. Days with clear skies might not always give you the dramatic shots you're after. Sometimes, those moody, cloudy days add the perfect drama to your wave shots. So, gear up, be patient, and let the sea show you its wonders.
Profiles of Local San Diego Surfers: Stories from the Sea
Meeting the local San Diego surfers gives us unique insight into the world of wave photography. Each surfer has their own story, a personal relationship with the sea that defines their journey. For instance, you might hear from Jake, who's been riding the waves since he was five, finding peace and adrenaline in the ocean's embrace. Then there's Mia, a professional surfer who travels the world but calls the San Diego shores her home, emphasizing the importance of respect for the ocean's power and beauty. Through their eyes, we see the challenges of conquering big waves, the dedication required to master surfing, and the sheer joy it brings. These stories from local surfers not only highlight the vibrant surf culture of San Diego but also underscore the connection between the photographer, the surfer, and the sea, crafting images that are as deep and compelling as the stories they tell.
The Role of Weather and Tide in Wave Photography
The weather and tide play a massive role in capturing the perfect wave photo. Sunny days might seem ideal, but it's the storms and the changing tides that really bring the drama and uniqueness to your shots. Here's the deal – high tides can make for dramatic wave pictures, with water crashing against rocks or spraying high into the air. But, don’t ignore low tides; they reveal hidden treasures along the coast, like unique rock formations or patterns in the sand that can add an interesting twist to your photos.
Now, light matters a ton. Early morning or late afternoon, the golden hours, as photographers call them, offer the best natural lighting. The angle of the sun can add depth and texture to the waves, making your photos pop. But here’s a twist - overcast days can also be your friend. The diffused light on a cloudy day helps capture the true colors and details of the surf without harsh shadows.
Understanding local weather patterns is key. San Diego's surf culture knows that the changing seasons affect wave conditions. Winter might bring larger swells, while summer offers more predictable, albeit smaller, waves. Paying attention to weather forecasts can mean the difference between an okay photo and a mind-blowing one.
Bottom line, it's not just about showing up at the beach and hoping for the best. Knowing the tide times, the weather, and the light can make or break your wave photography. So, do your homework, and then the real magic starts when you're behind the lens, ready to capture the raw power and beauty of the ocean.
How to Stay Safe While Shooting in the Surf
When you're out in the surf, capturing the raw beauty of San Diego's waves, safety should always ride the front wave. Surf photography comes with its rips and tides, so remember, the ocean respects the prepared. First off, know the surf. Study the weather and understand the water conditions. Big waves might look epic, but they can be fierce. Use a waterproof or water-resistant camera case. Saltwater and electronics? Not friends. Keep your gear secure. Strap that camera tight, maybe even tether it to you. You don't want your shot swimming away. Watch for surfers. You're in their playground. Stay aware, give them space, and don't get in their line. Lastly, know your exits. Things can change fast out there. Always have a plan to swim back or where to head if you need to bail quickly. Play it smart. Respect the ocean, and you'll nab those stunning shots safely.
Editing Tips for Eye-Catching Wave Photos
When you’ve snapped a great wave picture, the work isn’t done until you’ve given it a good edit. Editing makes the difference between a good and a stunning photo. First, always adjust the contrast. Waves look more dramatic with deeper contrasts, which highlight the power and detail in the water. Tweak the brightness but not too much; you want the picture to look natural. Enhancing colors is key. Make the blues and greens in the ocean pop, but stay true to the scene's natural hues. Don't forget about clarity and sharpness; these bring out the textures of the water and foam, making the viewer feel like they're right there on the beach. Lastly, consider cropping the photo to focus on the wave’s best part. Sometimes, less is more, and a close-up can capture the wave’s energy better than a wide shot. Stick to these tips, and your wave photos will surely grab everyone’s attention.
Conclusion: Celebrating San Diego's Waves Through Photography
Capturing San Diego’s waves is about more than just snapping pictures; it’s about celebrating a vibrant surf culture and the unspoken bond between the ocean and those who cherish it. San Diego, with its stunning coastlines and legendary surf spots, offers a canvas unlike any other for photographers who aim to immortalize the essence of surfing. Through their lenses, these visual storytellers not only showcase the thrilling moments of catching a wave but also highlight the serene beauty of the ocean's calm. Their work serves as a bridge, connecting viewers to the heart of San Diego's surf scene, allowing us to experience the joy, the adrenaline, and the sheer awe of the surf culture. So, when we look at wave photography from San Diego, let's see it as an invitation to dive into a world where every wave tells a story, and every photograph is a celebration of the ocean's majestic beauty.

Beyond the Beach: Exploring the Depths of Sea Photography
Introduction to Sea Photography: More Than Just Beaches
When you think of sea photography, maybe you imagine just snapping pictures of sandy beaches and crashing waves. But, it's way more than that. Sea photography dives deeper, exploring the oceans' mysteries, from vibrant coral reefs to mysterious shipwrecks, and the diverse life forms that call the sea their home. Whether you're on a boat, swimming underwater with your gear, or standing at the shoreline, every shot captures a unique story. It's not just about the beauty. Sea photography also helps us understand the importance of ocean conservation by highlighting the stunning diversity and the threats faced by marine environments. So, next time you're near the sea with a camera, remember you're at the edge of a vast world waiting to be explored and preserved through your lens.
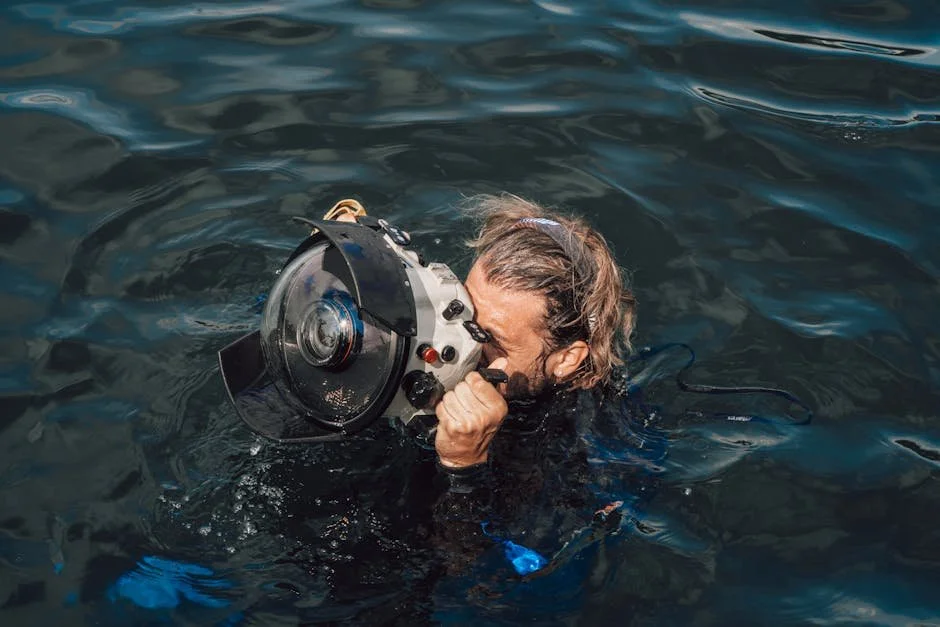
Essential Gear for Sea Photography Beginners
Starting sea photography requires more than just a camera. You need gear that can stand up to water, pressure, and salt. First, a waterproof camera or a waterproof case for your regular camera is non-negotiable. You can’t snap those underwater scenes without it. Second, invest in a durable tripod that's designed for underwater use. It’ll help you keep your shots steady amidst the ocean's currents. Third, a good quality lighting setup is crucial. Underwater, light behaves differently, and having artificial lights can make the difference between a murky shot and a vibrant one. Lastly, consider getting a protective gear bag. It’ll keep your expensive gear safe from saltwater and sand. Remember, the ocean is not forgiving to electronics. Start with these essentials, and you're on your way to capturing the beauty beneath the waves.
Understanding Light Underwater: A Key Challenge in Sea Photography
Underwater, light doesn't act the same way as it does on the surface. When you dive into sea photography, you quickly find that colors disappear, visibility reduces, and capturing sharp images becomes a skill to master. First, know that water absorbs light. The deeper you go, the more colors get swallowed up. Red vanishes first, followed by orange, and then yellow. This leaves a lot of your photos looking blue or green unless you tackle the problem head-on. You can do this by using underwater flash or strobe lights to add color back into your scenes. Understanding how to position these lights can make or break your underwater photos. It's not just about blasting light; it's about using it to highlight textures and shapes without overwhelming the natural beauty of the underwater world. Remember, mastering underwater light isn't just technical—it's artistic. It's about seeing how light plays in the liquid space and using it to tell a story, whether you're photographing a coral reef or a sunken ship.
Top Techniques for Captivating Sea Photography
Capturing the essence of the sea goes beyond just snapping pictures. It's about understanding light, timing, and perspective. Here's a dive into the top techniques to elevate your sea photography. First, focus on the golden hours, shortly after sunrise or before sunset, when the light adds a magical touch to the water. Use a polarizing filter. It cuts glare off the water surface, deepening the blues while making clouds pop. Experiment with shutter speeds for dynamic shots. Fast speeds freeze the motion of waves, while slow speeds create a silky-smooth effect on the water's surface. Dive below for unique angles; underwater shots add an intriguing perspective to your sea story. Lastly, remember the rule of thirds for composition to engage your viewers. Apply these tips, and you'll bring the ocean's majesty to whoever sees your work.
The Art of Composition Underwater
Getting the composition right makes underwater photos stand out. It's all about how you arrange elements in your frame. Keep it simple. Focus on one subject and make it the star of your show. Use the Rule of Thirds, where you imagine your image divided into nine equal parts. Place your main subject off-center for a more appealing shot. Look for contrasts, like a colorful fish against the blue sea, to add depth and interest. Pay attention to lighting. Natural light works best, especially near the surface. Underwater, colors change. Red disappears first, followed by orange and yellow. To keep colors vibrant, stay shallow or use a flash. Lastly, practice makes perfect. The more you dive and shoot, the better your underwater compositions will get. Dive in, explore, and let the underwater world’s beauty inspire your shots.
Capturing Marine Life: Tips and Ethical Considerations
When you dive into the world of sea photography, your mission is not just to snap pretty pictures. You become a storyteller and a steward of the underwater realm. Here's how to do it right. First, know your gear inside out. Underwater photography demands more than just a waterproof camera. You'll need a setup that's agile and adaptable to the rapid changes down below. Think about lighting, lenses, and housings – your toolkit for capturing the vividness of marine life.
Second, master buoyancy. It's your secret weapon. Good buoyancy control means you can hover without touching the sea bed, preserving the very sights you're there to capture. It reduces the silt and sand kicked up by clumsy movements, which can ruin shots and disturb habitats.
Now, the ethical side. Always put marine life first. Getting that perfect shot is never worth stressing or harming sea creatures. Use natural light whenever possible to avoid startling them. If using artificial light, do it sparingly. Remember, the sea is their home, not a studio. Be mindful of where you point your lens and the footprint you leave behind.
Patience is key. Wait for the creatures to come into view naturally. Rushing or chasing shots can lead to harmful interactions or missed opportunities. The ocean operates on its own time – learn to move with it, not against it.
In essence, capturing marine life through your lens is an exercise in respect, patience, and skill. Understand your impact, enhance your abilities, and you’ll not only take stunning photos but also contribute positively to the ecosystem you're privileged to witness.
Must-Visit Locations for Sea Photographers
For sea photographers eager to capture the majesty of the underwater world, planet Earth offers a treasure trove of locations. First on the list is the Great Barrier Reef in Australia, a vibrant underwater ecosystem teeming with life and color. It's a paradise for those looking to snap shots of unique marine species and sprawling coral gardens. Next, the clear, calm waters of the Maldives make it a haven for underwater photographers, where the light dances through the water to create ethereal photos of the rich marine life. Don't miss the Galápagos Islands either; this remote archipelago offers a glimpse into a wildly diverse underwater world, populated by creatures found nowhere else on Earth. For the adventurous at heart, the icy waters of Antarctica present a unique challenge and reward, revealing breathtaking landscapes and marine life adapted to the frigid environment. And let's not overlook the cenotes of Mexico – these natural pit or sinkholes offer crystal clear waters and a unique underwater experience with rays of sunlight piercing through, illuminating the below. Each of these locations provides a distinct backdrop for sea photography, promising adventure and the chance to capture the unparalleled beauty of our oceans.
Post-Processing Sea Photos: Bringing Your Underwater World to Life
After you're back on land with your camera full of sea captures, the magic of post-processing begins. This is where you bring your underwater world to life. Not every shot comes out perfect. Maybe the colors look faded, or the details aren't as sharp as you hoped. That's where editing comes in. Start with adjusting the white balance. The deeper you go, the bluer or greener your photos can appear because water absorbs colors like red and orange first. Adjusting the white balance brings back the natural colors of the sea life and the environment. Next, work on the contrast and brightness. Underwater shots can often look flat due to limited light. By tweaking these settings, you can make your subjects stand out more and give depth to your photos. Don't forget about sharpening the details. A little goes a long way to make those textures pop. Remember, the goal is to enhance, not to overdo it. You want your photos to look as close to what you saw as possible. Post-processing is an art. It takes time to master, but it's worth the effort to showcase the stunning beauty of your underwater adventures.
How to Share and Showcase Your Sea Photography
Once you've captured the majestic underworld of the sea, the next step is making sure people see your work. It's not just about posting your pictures online. You want to engage and captivate your audience. Here's how to do it effectively. First, think social media but be picky. Instagram and Facebook are solid choices for visuals. Use hashtags related to sea photography, underwater life, and marine conservation to reel in an audience who cares. Second, consider a dedicated website. This is your portfolio, your digital exhibit. It's where you tell the story behind each shot, share the difficulties you faced, and the moments that left you in awe. Websites like WordPress and Squarespace are user-friendly for non-techies. Third, exhibitions and competitions can elevate your work. They put you in front of enthusiasts and professionals who share your passion. Look for local galleries or online contests that focus on nature and underwater photography. And remember, sharing your work isn't just about the views or likes. It's about connecting with people who share your fascination with the sea's depths, spreading awareness on marine life conservation, and inspiring fellow photographers to dive into this challenging yet fulfilling field. Keep it simple, keep it passionate, and your work will surely captivate the hearts and minds of your audience.
Final Thoughts: The Endless Beauty of the Ocean Through a Lens
Capturing the ocean's essence through photography is more than just a hobby; it's a journey into a world less explored. The beauty of the sea, with its mysterious depths and diverse inhabitants, offers endless opportunities for photographers. Whether it's the stunning coral reefs, the playful dance of dolphins, or the majestic glide of whales, every snapshot tells a unique story. Embracing sea photography also means embracing a challenge. The unpredictable nature of the ocean, combined with the technical aspects of underwater photography, requires patience, practice, and a passion for discovery. Yet, the rewards are unparalleled. Photographs of the ocean not only highlight its beauty but also remind us of its fragility and the need to protect this incredible ecosystem. As we continue to explore and document the sea, we’re not just capturing images; we’re capturing moments that inspire awe and action. The ocean's depths hold stories waiting to be told, and through our lenses, we have the power to bring those stories to the surface.
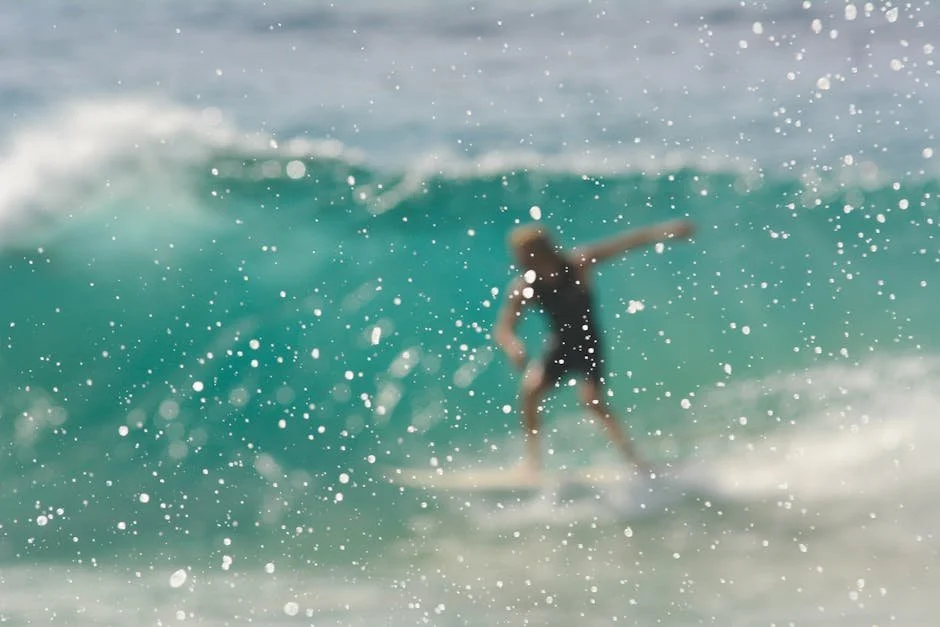
5 Tips for Capturing the Magic of the Ocean with Wave Photography
Introduction to Wave Photography: Capturing the Ocean's Beauty
Wave photography goes beyond just taking a picture; it's about capturing the ocean’s soul. Picture this: the sun peeking over the horizon, golden light spilling across the water's surface, and waves crashing with raw energy. That's the magic you want to freeze in time. Starting out, you need to know a few basics. First, the ocean is unpredictable. This means every wave brings a new chance for an incredible photo but also challenges. Understanding the ocean's moods and the best lighting is essential. Early mornings or late afternoons offer the best light for that mesmerizing glow on the water. Next, gear matters but doesn't get bogged down in technicalities. A good camera and a willingness to get a bit wet are your basic needs. Remember, capturing the ocean's beauty is about feeling the moment and letting the waves tell their story through your lens. Dive in, explore different angles, and let the waves surprise you.

Best Time of Day for Wave Photography
The magic in wave photography? It's all about timing. Plain and simple, the best time to shoot waves is during the golden hours. That's right after sunrise or just before sunset. Why? Because the light is softer, warmer, and doesn't cast harsh shadows on the water. This light makes the ocean look like it's glowing, bringing out colors and details you won't see midday. Plus, the sun's angle creates dramatic shadows and textures in the waves, giving your photos depth. Remember, early morning is often calmer, with less wind and fewer people to disturb the scene. Evening sessions can surprise you with vibrant sunset hues bouncing off the waves. So, set your alarm early or plan for an evening shoot. Catching waves in the golden hours is a game changer for that magical shot.
Understanding the Equipment Needed for Capturing Waves
To capture the magic of ocean waves, you need the right gear. A sturdy tripod is essential to keep your camera stable against the force of the waves and wind. A DSLR or mirrorless camera that allows manual control over settings like shutter speed and aperture gives you the flexibility to capture waves in all their glory. A waterproof camera or a waterproof housing for your camera is crucial if you plan on getting close to the action without risking damage. Lenses matter too—wide-angle lenses help capture the vastness of the ocean, while a telephoto lens can zoom in on distant waves. Lastly, don’t forget a cleaning kit to keep salt spray off your lens and camera body. Remember, having the right equipment is half the battle in wave photography.
Tips for the Perfect Wave Composition
To nail the perfect wave composition, you need to think about three things: timing, position, and camera settings. First off, timing is everything. You have to catch waves at the right moment to capture their true essence. This means being patient and attentive; waves have a rhythm, and you'll start to notice patterns. Position yourself at a spot where you can safely get a good view of the waves. Sometimes, this means getting your feet wet or finding a high vantage point. Lastly, tweak your camera settings. Generally, a fast shutter speed will freeze the motion of the wave, capturing every detail. But playing with slower shutter speeds can create a smooth, dreamy look to the water. Experiment to see what works best for the kind of mood you're trying to convey. Remember, the best wave photos are a blend of preparation and spontaneity.
Mastering the Art of High-Speed Shutter Techniques
To nail those stunning ocean wave shots, you've got to master high-speed shutter techniques. This lets you freeze the action of the waves, capturing every splash and droplet in crystal clear detail. You want your camera settings dialed to a high shutter speed. Think in the range of 1/1000th of a second or faster. This fast snap means you catch the wave at just the right moment, making it look like it's frozen in time. Remember, a fast shutter speed demands good lighting. Early mornings or late afternoons, when the sun casts golden hues over the water, are prime times. If the light's low, bump up your ISO a bit. Just keep it as low as possible to avoid grainy shots. Play with angles too. Get down low or shoot from above. This isn't just about speed. It's about seeing the ocean in a way most people miss. Start experimenting, and soon, you'll snag those breathtaking, dynamic wave photos that everyone admires.
Working with Natural Light and Weather Conditions
Capturing the ocean’s magic is all about timing and embracing the elements. Natural light plays a huge part in wave photography. Early morning or late afternoon, when the sun is low, gives you soft, warm light that can make your photos come alive. This is what we call the golden hour. It adds a magical touch to the waves, creating textures and shadows that add depth to your shots.
Weather conditions can also make or break your ocean shots. Overcast days might seem dull, but they provide even light and help capture the true colors of the sea without harsh shadows. Plus, storms can lead to dramatic wave action. The key is to watch the weather closely and be prepared to snap shots before, during, and after a storm (always safely, of course).
Remember, working with what nature offers rather than against it can turn your wave photography from good to breathtaking. Keep an eye on the light, the cloud cover, and even the wind direction. Each element can add a unique mood to your ocean captures, making your photos stand out.
The Importance of Patience and Timing in Wave Photography
Patience is not just a virtue; it's your secret weapon in wave photography. The ocean is unpredictable. One minute it's calm, the next it's a tempest of perfect waves. This unpredictability means you can’t rush. Wait for the right moment. Sometimes, this means hours for that perfect wave to crash or for the lighting to cast its magic on the water. Timing is equally crucial. It's all about catching waves at just the right second to showcase their power and beauty. Early morning or late afternoon, known as the golden hours, can provide the best natural lighting. The difference a second can make in wave photography is staggering. A fraction too early or too late, and you miss the drama. Together, patience and timing let you capture the ocean's magic like never before. So, breathe in the sea air, wait, and click at the precise moment.
Safety Considerations When Photographing Waves
When you're out there aiming to capture the ocean's magic, safety should never take a backseat. First off, always keep an eye on the weather. Sudden changes can spell disaster if you're not prepared. Stick to known spots, especially ones familiar to locals or recommended by fellow photographers. These places are usually safer and provide better opportunities for stunning shots. Next up, don't turn your back on the ocean. Rogue waves can appear out of nowhere. Stay vigilant. Remember your gear too. Waterproof it as much as possible because saltwater and electronics don’t mix. Finally, know your limits. It’s easy to get caught up in the chase for the perfect shot, but your safety is more valuable than any photo. Stick to these guidelines, and you’ll stand a better chance of taking home incredible wave photography without risking your neck.
Editing Your Wave Photos for Maximum Impact
Editing your wave photos is like the final, crucial seasoning that can turn a good dish into a great one. It's where you bring out the best in your shots, making sure each wave's unique beauty shines through. Start by adjusting the brightness and contrast to make the wave pop against the background. Boost saturation slightly to make the colors more vivid but avoid going overboard; you want the blues to look inviting, not artificial. Sharpening is your friend to highlight the intricate details of the water, but again, moderation is key; too much can make the photo look harsh. Lastly, don't forget to play with the cropping tool. Sometimes, a tighter frame can transform a decent photo into a striking composition that captures the viewer's attention. Remember, the goal is to enhance, not to overwhelm. The ocean's natural beauty should always be the star of the show.
Conclusion: Creating a Lasting Impression with Your Wave Photography
So, you've journeyed with us through the highs and lows of wave photography, learning tips and tricks to capture the ocean's might, mood, and majesty. Remember, it's not just about snapping shots but creating art that echoes the ocean's soul. Your lens is a window to the sea's heart, and with patience, practice, and passion, you'll craft images that not only impress but also inspire. Keep experimenting with angles, timing, and settings to find what brings out the best in your wave photos. And most importantly, let your love for the sea shine through your work. Your unique perspective is what will set your photos apart, turning them from mere pictures into lasting impressions. Wave photography is a journey — keep pushing the limits, and you'll continue to discover the ocean's boundless beauty.

The Art of Storytelling Through Ocean Landscape Photography in San Diego
Introduction to Ocean Landscape Photography in San Diego
Ocean landscape photography in San Diego is not just about snapping shots of the sea. It’s an art that tells stories. This city offers a unique canvas with its stunning coastlines, majestic sunsets, and vibrant marine life. When photographers capture these scenes, they share tales of nature's beauty, serenity, and power. San Diego's coastline stretches from the calm family beaches in La Jolla to the rugged cliffs of Torrey Pines. Each spot provides its own story. The key is to open your eyes and feel the moment. Whether it’s the golden hour that paints everything in a warm light or the calm blue mornings, every picture has a narrative. Remember, in ocean landscape photography here, you're not just a photographer. You're a storyteller capturing the ephemeral beauty of the ocean. So, get your camera ready, find your spot, and start telling your stories through your lens.

The Unique Beauty of San Diego's Coastal Scenes
San Diego's coast is not your everyday beach view. It's a blend of bustling city skylines and tranquil, untouched shores. Here, the Pacific Ocean meets cliffs, caves, and sand in a way you won't see anywhere else. Every beach, from La Jolla to Coronado, tells a different story. La Jolla Cove brings you face to face with sea lions, while the sunset at Sunset Cliffs paints the sky in colors you didn't know existed. Coronado Beach stretches with golden sands that shimmer against the historic Hotel del Coronado. It's not just about the places; it's about the moments they create. These scenes offer endless inspiration for photographers. Capturing the unique beauty of San Diego's coastal scenes means more than just taking pictures. It's about freezing a moment that tells a story of natural beauty, power, and serenity. Whether you're a local or a visitor, every shot of the ocean landscape here adds a new chapter to your story.
Essential Gear for Ocean Landscape Photography
To nail ocean landscape photography in San Diego, you need the right gear. At the core, a high-quality camera capable of capturing wide dynamic ranges is crucial. DSLRs and mirrorless cameras are favorites for their versatility. Next, a wide-angle lens is a must. It lets you capture the vastness of the ocean and the sky, pulling viewers into the scene. Don't forget a sturdy tripod to keep your shots steady against the ocean breeze. Polarizing filters can be game-changers too. They reduce glare off the water and make the sky pop out, giving your photos a crisp look. Lastly, never underestimate the importance of a reliable camera bag that's waterproof. The ocean's unpredictability means splashes and sand can threaten your gear. With this setup, you're ready to capture the ocean's ever-changing story, from the calm mornings to the dramatic sunsets.
Understanding the Best Lighting for Ocean Shots
Light makes or breaks a photo, especially with ocean landscapes. The best time to capture the ocean's true beauty is during the golden hour. This happens twice a day—shortly after sunrise and just before sunset. Why? Because the light is softer, richer, and warmer. It casts the water and rocks in a golden glow that’s not just magical but also very forgiving. No harsh shadows to worry about or squinting subjects. It’s also the perfect time to capture the contrast between the serene blue of the sea and the fiery hues of the sky. For a more dramatic effect, try shooting during the blue hour—the twilight period either in the morning before sunrise or in the evening after sunset. The light is softer and bluer, giving your photos a cool, mystical look. Remember, the key is to experiment with different lighting conditions to see what works best for the story you’re trying to tell with your ocean landscape shots.
Mastering Composition in Ocean Photography
Mastering composition in ocean photography is all about where you point your camera and how you frame your shot. Think of it as telling a story without using words. The ocean, with its vastness and ever-changing mood, can be a challenging subject. But, here's how you keep it simple and nail your shots. First, follow the rule of thirds. Imagine your frame divided into nine equal parts by two equally spaced horizontal and vertical lines. Place interesting parts of the scene along these lines or at their intersections. It makes your photos more balanced and invites viewers to wander through your picture. Second, pay attention to leading lines. These could be the shoreline, a jetty, or waves crashing – anything that draws the eye deeper into the photo. It's like you're grabbing the viewer's hand, guiding them through the scene. Lastly, don't forget about the foreground. Adding elements like rocks, sand patterns, or even a piece of driftwood can add depth and make your image stand out. It's not just about the ocean; it's about the story you're telling with the scene. So, next time you're out with your camera facing the sea, remember these tips. They'll help transform your ocean landscapes from good to breathtaking.
Capturing Movement: Waves, Wildlife, and Weather
Capturing movement in ocean landscape photography isn't just about snapping a photo at the right time. It’s about feeling the rhythm of the waves, predicting the wildlife's next move, and being prepared for sudden changes in weather. When you're out there, knee-deep in the sand at San Diego's beaches, remember, the ocean plays by its own rules. Timing is everything. You want to catch the waves at that perfect moment when they are curling, just before they break – that's the sweet spot. And wildlife? They won't pose for you, so stay ready. A calm seal might suddenly leap, or a flock of birds could take off. As for weather, a sunny day can turn gray and windy in a flash, but that’s your chance. Dramatic weather equals dramatic photos. Remember, it's about more than just the right equipment; it’s about patience, timing, and a bit of luck.
The Role of Storytelling in Ocean Landscape Photography
Storytelling in ocean landscape photography is not just about capturing the waves; it's about sharing the soul of the sea with the world. Every picture tells a story, and in San Diego, where the ocean is a vast canvas of moods and colors, photographers have the unique chance to narrate the ocean's tale. Through their lenses, they can showcase the serene sunrise, the vibrant life beneath the waves, or the dramatic clash of stormy seas against the cliffs. Each photo is a chapter of the ocean's story, inviting viewers to feel the salt in the air, hear the distant seagull's call, and marvel at the dance of light on water. It's about creating a connection between the viewer and the vast, mysterious ocean, making them appreciate its beauty, respect its power, and understand its importance to our world. Storytelling through ocean landscape photography in San Diego transforms simple snapshots into profound experiences, turning the ephemeral into something eternal.
Post-Processing Tips for Enhancing Your Ocean Photos
When you're back from the beach, post-processing is where your ocean photos turn from good to breathtaking. Even the most experienced photographers rely on editing to bring out the best in their shots. First, always shoot in RAW. This gives you the most data to work with, making adjustments in exposure and color balance easier without loss of quality. Use editing software like Lightroom or Photoshop. Play with the exposure settings; often, ocean photos need a bit of brightening. Don’t overlook the importance of contrast and clarity to make the waves pop. Colors are key too. Enhance the blues to keep the ocean looking vibrant yet natural. However, be cautious not to overdo it, or your photo will look unrealistic. Shadows and highlights need your attention as well. Adjust them to add depth to your shots. Lastly, remember that less is more. Subtle changes often have the most impact. Your goal is to enhance, not to completely change, the natural beauty of the ocean landscape.
Challenges and Solutions in Ocean Landscape Photography
Ocean landscape photography, especially in a place as stunning as San Diego, comes with its set of challenges. First off, dealing with light is tricky. Early morning and late afternoon are golden hours, but the light changes fast. Miss your moment, and you might not get that dream shot. Then there’s the saltwater; it's harsh on gear. Cameras and lenses can get corroded if not cleaned properly after each session.
Let's talk solutions. For the lighting, work with it, not against it. Plan your shoots around the golden hours for that soft, magical glow. Use a weather app to predict the cloud cover; some clouds can add drama to your shots. For tackling the saltwater issue, make it a ritual to gently wipe down your gear with a fresh water-dampened cloth after shooting.
Next, keeping your lens free from spray and mist while shooting can be frustrating. A simple solution? Keep a lens cloth handy at all times, and maybe even a lens hood to block some of the spray.
Lastly, the unpredictable ocean means sometimes you can't get as close as you'd like, or the tides aren't in your favor. Patience is key here. Also, investing in a good telephoto lens can help bridge the distance, allowing you to capture the grandeur of the ocean from a spot that's safe and gives you the composition you want.
Remember, overcoming these challenges is part of the journey in ocean landscape photography. Each hurdle navigated improves your skill and makes those stunning San Diego seascapes even more rewarding to capture.
Showcasing San Diego: A Gallery of Ocean Landscapes
San Diego's coastline is a treasure trove of storytelling scenes, each snap of the camera capturing a tale as timeless as the ocean itself. Picture this: the warm glow of sunset painting the sky in hues of orange and pink, the waves whispering secrets as they kiss the shore, each photograph a love letter to the beauty of the Pacific. From the iconic cliffs of Torrey Pines to the serene shores of La Jolla, the variety is staggering. It's not just about taking a picture; it's about freezing a moment, showing the world a glimpse of the raw, untamed majesty that is San Diego's ocean landscapes. This gallery isn't just a collection of images; it's a narrative, woven with light, shadow, and color, inviting the viewer to step into a world where every frame tells a story of wonder, tranquility, and the sheer force of nature. So, dive in. Let each photograph guide you through the art of storytelling where the ocean is both the canvas and the muse.
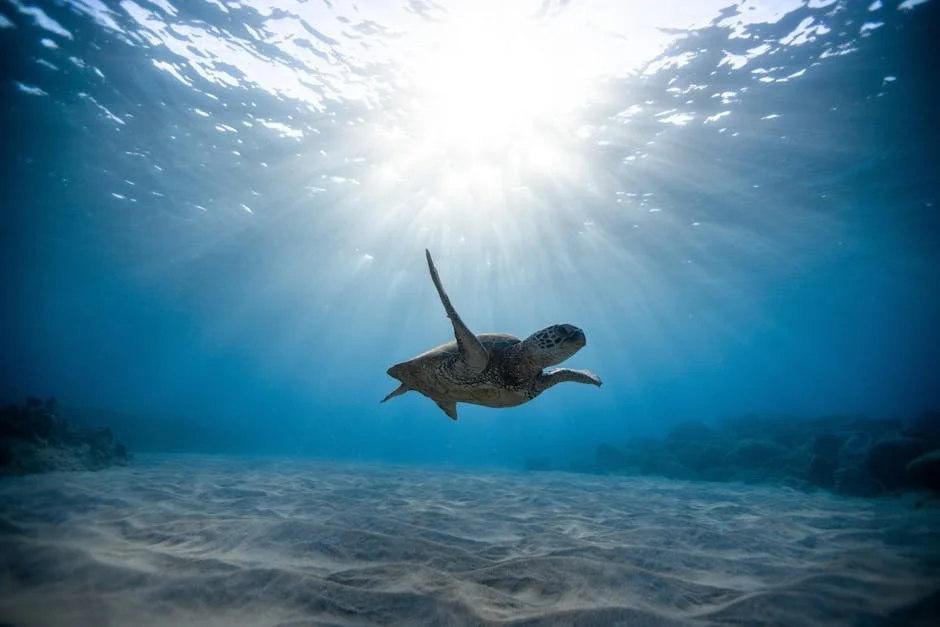
5 Spectacular Locations for Marine Life Photography Adventures
Introduction to Marine Life Photography
Marine life photography is not just about snapping pictures underwater. It's an art and a science that captures the beauty and complexity of ocean life. This fascinating genre requires patience, skill, and a good eye for detail. Whether you're diving into the deep blue or snorkeling near the shore, the ocean offers a mesmerizing world full of colors, textures, and creatures waiting to be photographed. From the tiny, vibrant nudibranchs to the majestic whales, every click has the power to tell a story. But remember, it’s not only about getting the perfect shot; it’s also about respecting the natural habitat and preserving marine biodiversity. Join us as we dive deeper into marine life photography and uncover the secrets to capturing the ocean’s wonders.

The Best Conditions for Marine Life Photography
Great marine life photography isn't just about showing up; it's about timing and conditions. First thing's first, clear water is key. Murky water can ruin what would otherwise be a stunning shot. Look for days when the water is calm because rough waves stir up silt and debris, making your photos look muddy. Light matters too. Morning light or late afternoon are gold for photographers. This soft, natural light brings out the vibrant colors of marine life without the harsh shadows or overexposure you get in the midday sun. Depth is another consideration. Many marine creatures are more active and visible in shallower depths where sunlight reaches. However, deeper waters have their own mysterious appeal and unique inhabitants. If you're after something specific, research their habits and habitats. Lastly, don't forget about the weather. Overcast days can diffuse light evenly, reducing glare on the water's surface and offering a unique perspective on the underwater world. So, timing your dive with the weather, water clarity, light, and depth can make all the difference in marine life photography.
Location 1: Great Barrier Reef, Australia
The Great Barrier Reef in Australia is like the heavyweight champion of the underwater world. Stretching over 2,300 kilometers, this marine paradise boasts more than 2,900 individual reefs and 900 islands. It's not just big; it's packed with life. Here, photographers can capture everything from tiny, vibrant nudibranchs to the majestic humpback whale. The water clarity is insane, making it a dream for capturing those crisp underwater shots. Whether you're snorkeling just off the coast or diving deep among the coral catacombs, every moment has the potential to be a front-page masterpiece. It's not just about the big guys, though. The vivid colors of the coral, the schools of electric blue damselfish, and the occasional curious sea turtle make every dive a treasure hunt. For those aiming to tick off extraordinary marine photography adventures from their bucket list, the Great Barrier Reef should be at the very top. Remember, this place is not just a photo op; it's a delicate ecosystem facing real threats. Capture its beauty, but always respect the ocean's rules.
Capturing the Vibrancy: Tips for Great Barrier Reef Photography
When you're in the Great Barrier Reef, every shot counts. It’s a visual feast out there. First, remember the light underwater is different. Start early in the day when the light is gentle. This gives you vivid colors without the harsh shadows. Use an underwater camera or a waterproof case for your gear. Trust me, it's worth it. Don't overlook the importance of getting close to your subject; it reduces the water particles between you and your target, making your shots clearer and more colorful. But, respect the marine life. No touching. Stay calm, move slowly. Fast movements scare off the creatures you're trying to capture. Lastly, practice your buoyancy. Good control means you're not stirring up sand or bumping into coral. It makes a huge difference. Remember, patience is key in getting that perfect shot.
Location 2: Raja Ampat Islands, Indonesia
Raja Ampat Islands in Indonesia is a dream spot for any underwater photographer. Picture this: a vibrant underwater kaleidoscope, thanks to its rich marine biodiversity. It's not just about the numbers, but the variety. You'll find over 600 types of coral and around 1,500 fish species. Every dive promises something new, something vibrant. The islands are remote, adding to the exclusivity of your experience. The best part? The visibility is often excellent, giving you clear shots of the underwater wonders. Imagine capturing the dance of a school of barracuda or the solitary grace of a whale shark. In Raja Ampat, your camera is your ticket to an unparalleled visual feast. Remember, getting there might be a trek, but each snapshot you take will remind you why it’s absolutely worth it. Dive into Raja Ampat, and let the islands’ underwater spectacle mesmerize you.
Techniques for Photographing Raja Ampat's Biodiversity
When you're aiming to capture Raja Ampat's underwater biodiversity, your technique matters. This region, known for its stunning marine life, demands respect and skill from photographers. First off, plan your dives during the times when sunlight works in your favor. Early morning or late afternoon, when the sun's rays cut through the water at an angle, can add magic to your shots. You'll want to get close to your subjects but not too close. Disturbing the marine life is a big no-no. Use a macro lens for those detailed close-ups of smaller creatures and a wide-angle lens for capturing expansive coral reefs or groups of fish. Lighting is crucial. Underwater, colors disappear the deeper you go. A good underwater flash or strobe can bring back those vibrant hues. However, always diffuse your light to avoid startling the creatures or causing harsh shadows in your photos. Finally, patience is your best ally. Wait for that perfect moment. Sometimes the most breathtaking shot comes when you least expect it, but only if you're ready and waiting.
Location 3: Galápagos Islands, Ecuador
The Galápagos Islands in Ecuador, where evolution whispers secrets through its unique creatures, is a must-stop for any marine photography enthusiast. Here, water mirrors sky, and life thrives in forms so vivid they seem unreal. For starters, giant tortoises roam slow and steady, sea lions play tag in the shallows, and nowhere else might you get so close to playful penguins outside the icy domains. But it's underwater where the Galápagos truly shine. Snap shots of hammerhead sharks, marvel at the rainbow parades of fish, and don't be surprised if a curious sea turtle photobombs your perfect shot. This place isn't just about taking pictures; it’s about capturing moments that beg the world to look, listen, and respect the natural art of our planet. The Galápagos offers a palette of wonders, turning every dive into a masterpiece in motion. Remember, visiting here means accepting the mantle of both explorer and guardian, ensuring these scenes remain timeless for cameras yet to come.
Mastering Marine Photography in the Galápagos
When you set foot in the Galápagos for marine photography, you're diving into a world unlike any other. This place is raw and alive, with nature playing by its ancient rules. First, get comfortable with your gear above water. Know your camera like the back of your hand, because underwater, things look and behave differently. Lighting, for instance, can be tricky. The water absorbs colors like red and orange first, leaving you with a lot of blues and greens. A good tip is to get close to your subjects to bring back those lost colors. And remember, it’s not just about the camera. Your approach matters too. Move slowly, be patient, and let the creatures come to you. Disturbing their natural habitat is a big no-no. Finally, respect the rules of the Galápagos. This place is pristine because it’s protected. Follow guidelines, don't leave anything behind and take only pictures. Mastering marine photography here means becoming one with the environment and capturing its essence without disturbing the balance. It's challenging, but the rewards are photos that few can dream of, let alone capture.
Location 4: The Red Sea, Egypt
The Red Sea in Egypt isn't just another diving spot; it's a world-renowned treasure among photographers and marine life enthusiasts. Why? For starters, the visibility here can exceed 200 meters, making it a dream come true for capturing vivid underwater scenes. Then there's the marine biodiversity - it's off the charts. From hard and soft corals teeming with life to over 1,200 species of fish, about 10% of which are found nowhere else on Earth. But that's not all. Shipwrecks like the SS Thistlegorm and the Dunraven add an eerie yet captivating backdrop to any underwater photo shoot. The best part? The Red Sea's warm waters make it a year-round destination for divers and photographers alike. So, gear up your camera; unparalleled marine photo adventures await in the Red Sea.
Strategies for Excelling in Red Sea Photography
To capture the vibrant life under the Red Sea, you'll need more than just a good camera. Start by planning dives during times when sunlight can enhance the underwater scenery. Early morning or late afternoon are golden hours that bring out the best colors. Keep an eye on the weather and water conditions; calm and clear water is your friend. Don't rush. Spend time observing the marine life and their habits. Often, the most captivating photos come from understanding your subject. Use natural lighting as much as possible, but for deeper dives, investing in a quality underwater light can make a significant difference. Getting close to your subject reduces the water between your camera and the subject, leading to clearer, more detailed shots. However, always respect marine life and keep a safe distance to avoid causing stress to the creatures you're photographing. Practice makes perfect. The more you dive, the better you'll understand the unique challenges of underwater photography in the Red Sea. Remember, patience and respect for the marine environment are key. Happy shooting!
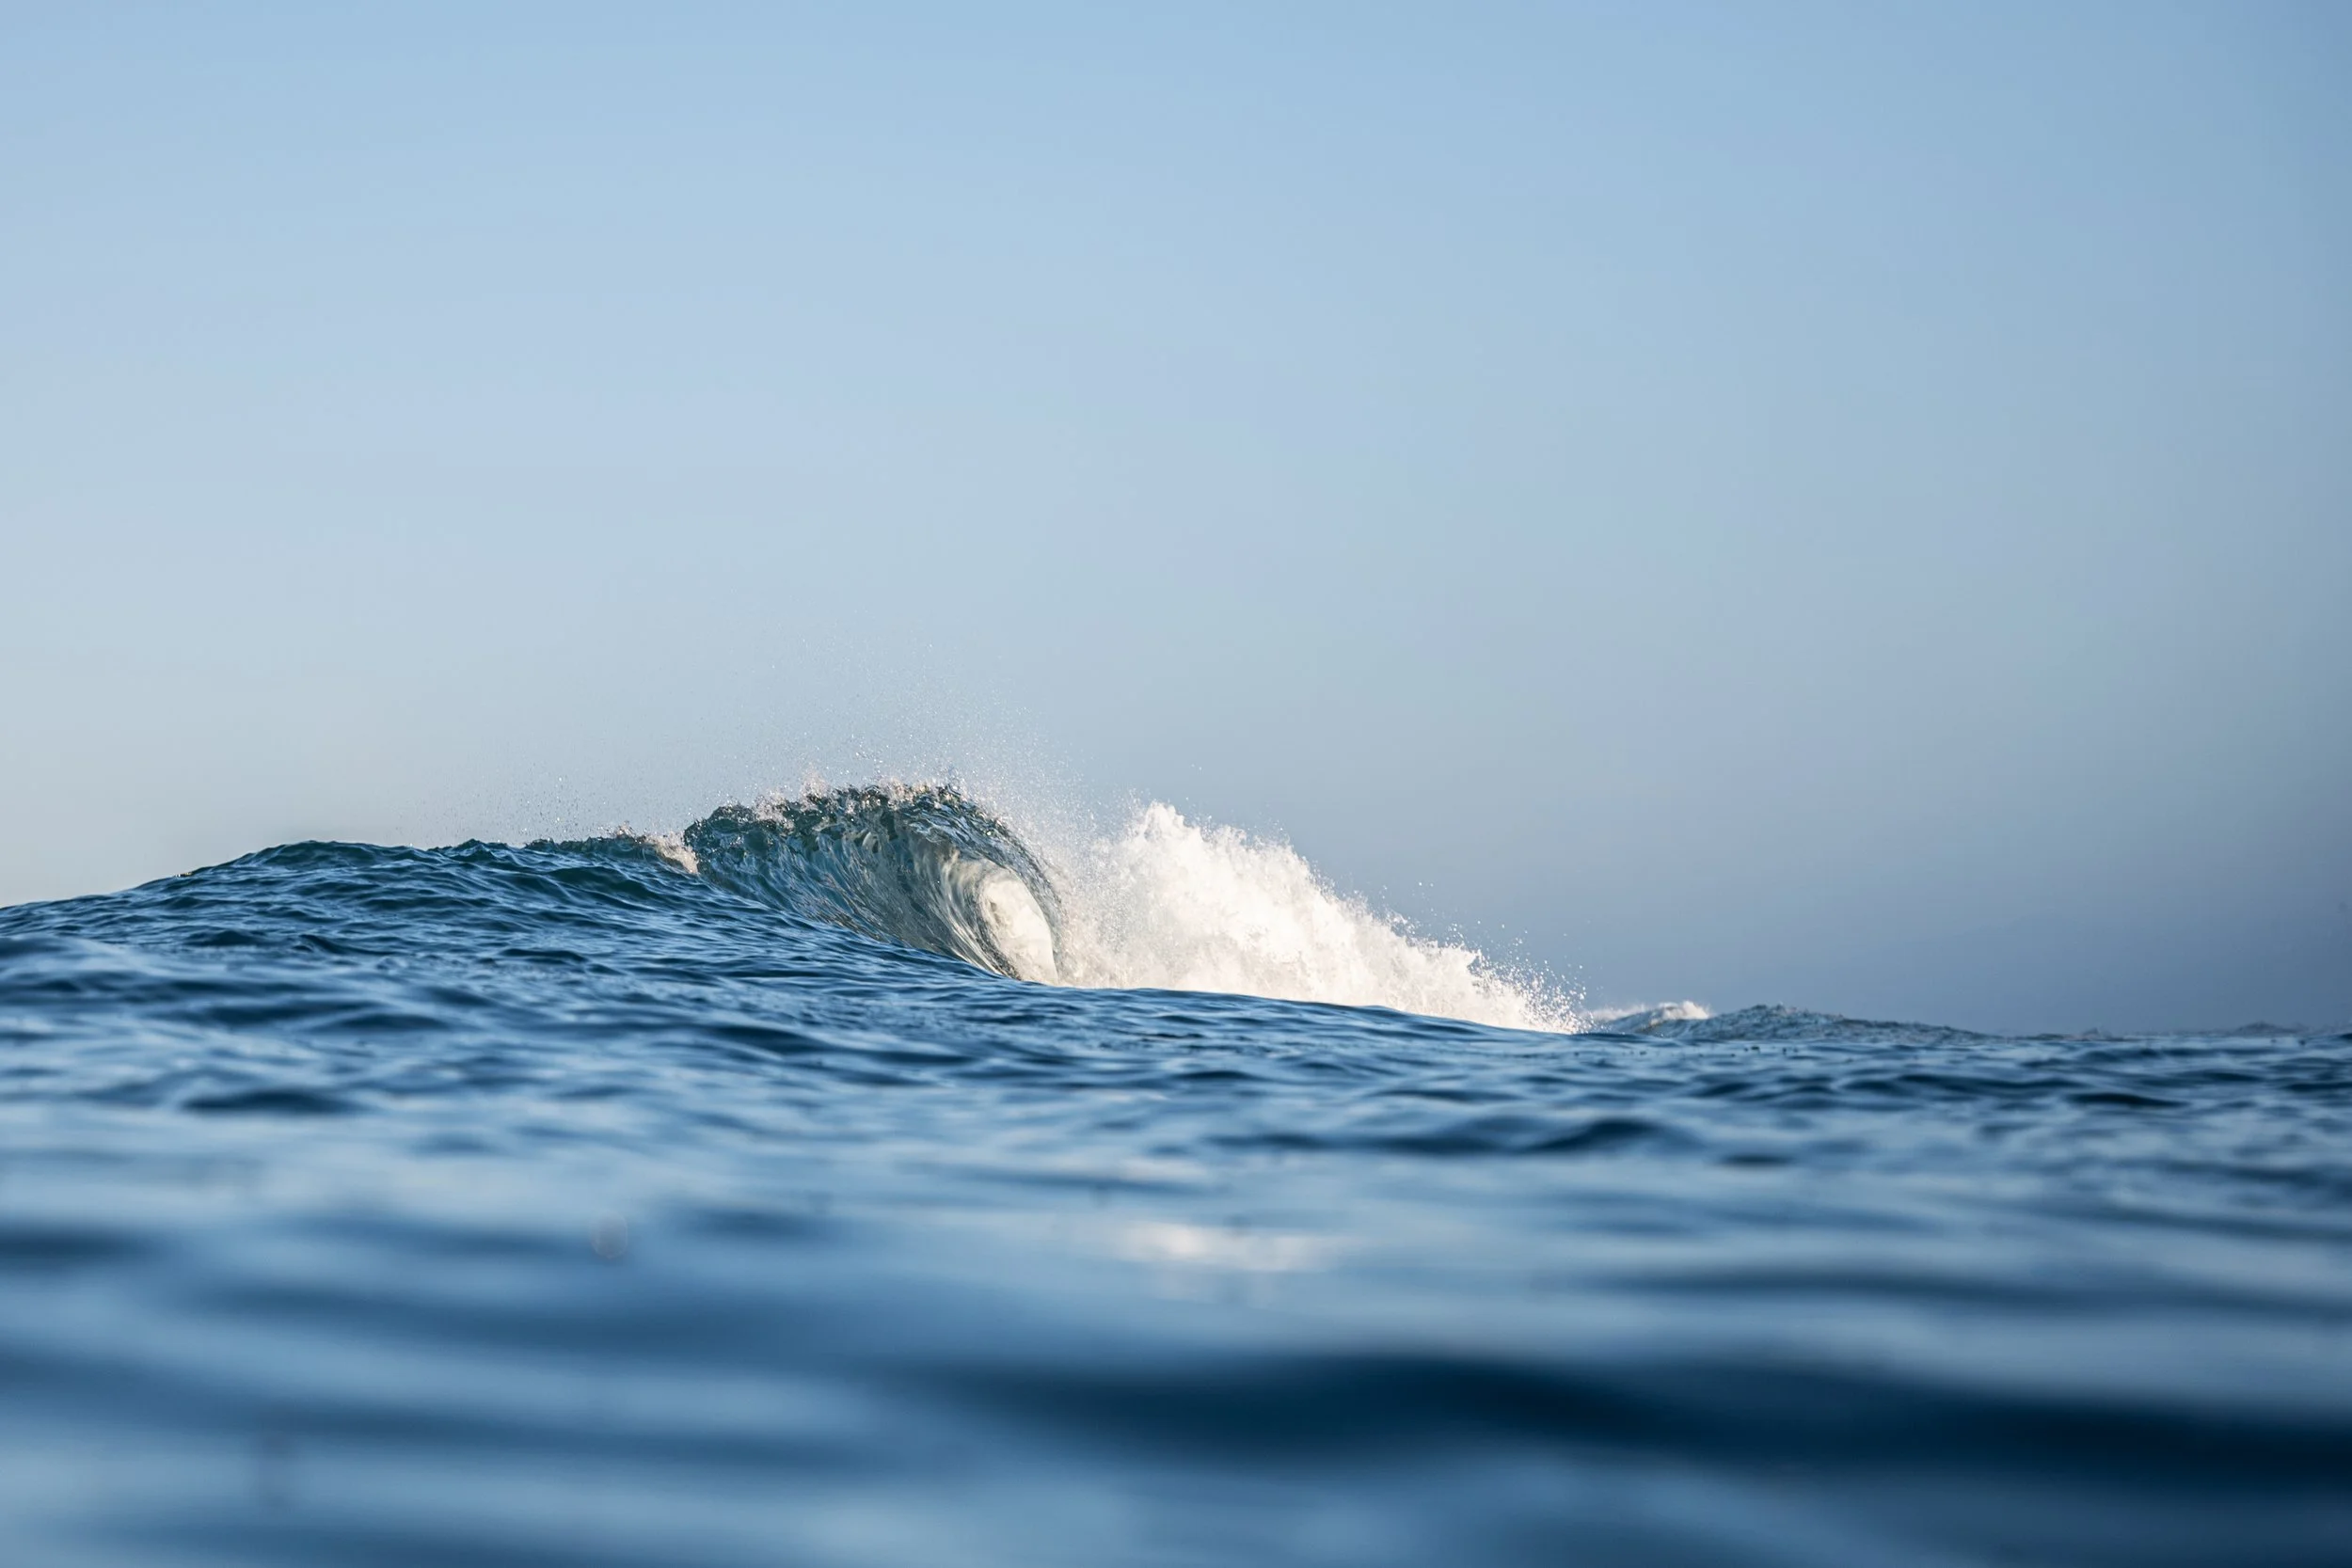
Seascape Wall Art: A Gateway to Reliving Your Favorite Coastal Memories
Introduction to Seascape Wall Art
Seascape wall art captures the essence of the ocean and brings it into your home. Imagine standing on the beach, feeling the soft sand beneath your feet, the soothing sound of waves, and the calm breeze. That’s the magic seascape art brings to your space. It's not just a picture; it's an experience, a memory frozen in time. From photographs of serene beaches at dawn to paintings of dramatic coastal storms, this art form covers the full spectrum of oceanic beauty. Whether you’re a sailor at heart, a beach lover, or someone who finds peace in the vastness of the sea, there’s a piece of seascape wall art waiting to connect with you. It’s more than decor; it’s a window to your favorite coastal memories, inviting you to relive those moments every day.

Sunset Cliffs, San Diego
The emotional impact of seascapes in interior design
Seascape wall art isn't just about pretty pictures. It's way more. When you hang a seaside painting or photo in your room, it does something cool. It's like magic; it brings the calm and soothing vibes of the ocean right into your space. This isn't just talk. Science backs it up. Studies show that images of nature, especially water, reduce stress and increase happiness. Think about it. You're having a rough day, you look at your seascape wall art, and bam, you feel a bit lighter. It's like a mini-vacation on your wall. Seascapes in interior design go beyond decoration. They're about creating a vibe, an escape, or bringing back memories of your best beach vacations. So, yeah, adding a piece of seascape to your room isn't just about making the place look good. It's about adding a layer of peace and joy to your daily life.
Choosing the right seascape wall art for your space
Picking the right seascape wall art is all about vibe and feel. It’s like bringing the ocean to your room without getting your feet wet. First, think about the mood you want. You looking for calm and serene or stormy and dramatic? Light tones bring peace, while dark colors add a touch of mystery. Size matters too. Got a big wall? Go for a large piece that makes a statement. Small space? A petite painting can be just as impactful. Next up, the style. Are you more into realistic scenes that make you feel like you’re staring at the horizon, or do abstract waves and colors speak to you? Don’t forget about the frame. A simple frame can keep the focus on the artwork, while something more ornate can dress it up a bit. Remember, the art you choose should make you feel good every time you look at it. It's your slice of the coast, right there in your living space.
Popular destinations and scenes in seascape art
Seascape art has the magic to transport you right to the coast with just a glance. Let's talk about some favorite spots and scenes that often make their way into these captivating pieces. First up, the classic beach sunset. Artists love capturing that moment when the sun kisses the ocean, turning the sky into a canvas of pink, orange, and purple hues. It’s a scene that never gets old. Then, there’s the powerful ocean storm. Waves crashing, dark clouds rolling in – it’s nature's drama at its finest, and it makes for a thrilling piece of art. Don't forget about tranquil harbor views. Boats gently bobbing on calm waters, with perhaps a quaint village in the background, evoke feelings of peace and nostalgia. Of course, the mysterious deep sea is a subject full of wonder. Think about colorful coral reefs teeming with life or the solitude of a lone lighthouse standing guard against the vast sea. Each piece reflects a unique aspect of the sea's beauty and power, making seascape art a perfect way to keep your favorite coastal memories close.
Material options for seascape artworks
When picking out seascape wall art, you've got a buffet of material options to choose from, each bringing its own vibe to your space. Let's break it down. First up, canvas prints. They're like that casual, laid-back friend who's always up for an adventure. Canvas gives off a classic look, making those ocean blues pop. Plus, they're pretty durable and can handle a bit of sunlight without throwing a fit. Next, we've got metal prints. These are your sleek, modern buddies. They really make those colors shine bright and stand up to moisture like a champ, perfect for rooms that might get a bit steamy or for outdoor spaces. Then, there's wood prints. Imagine the warm, rustic feels of a cozy beach cabin. Wood adds a natural, earthy touch to your art, great for a down-to-earth vibe. Each material not only affects the look but also the atmosphere of your room. So think about the vibe you want to bring into your space when you're choosing. Whether it's the laid-back canvas, the sharp metal, or the cozy wood, there's something for every slice of the ocean you're looking to capture. Checkout this gallery to configure options on your next wall art.
How seascape art complements various room styles
Seascape wall art is like a fresh breeze for any room, easily matching different styles. Picture this: a minimalist room, clean lines, and neutral colors. Now, add a bright, vibrant seascape painting. Instantly, the room gets a splash of color and a focal point, without overwhelming the space. In a modern setting, large, abstract seascapes with bold strokes and unconventional colors add an edge, giving the room a dynamic vibe. For those who lean towards the traditional, classic seascapes bring a sense of calm and timelessness, often acting as windows to the tranquil sea, fitting smoothly into the décor. In bohemian styled rooms, mixed with eclectic furniture and varied textures, colorful and whimsical seascapes inject an extra layer of creativity and freedom. Essentially, no matter the room's aesthetic, seascape art has a unique way of enhancing the space, making it feel more open, relaxed, and deeply connected to the beauty of the coast. It's like a magic touch, bringing your favorite coastal memories right into your home.
Installation tips for creating a coastal ambiance
When you're ready to bring the coast into your home with seascape wall art, keep it simple and easy. First, choose a spot where the art will be the focal point. Natural light can enhance the colors and mood of a seascape, so consider placing it opposite or near windows. Don't overcrowd the wall; let the art breathe by leaving some space around it. This isn't just about hanging a picture; it’s about creating a vibe. Use light, sandy colors for frames or no frame at all, to keep the focus on the artwork. Lighting plays a big role - soft, warm lights can mimic the sun's glow, adding to the coastal feel. Remember, the goal is to revive those beach memories, so position your art at eye level to make it easy to get lost in the view. Lastly, mix and match different sizes of seascape art, but keep to a theme to maintain harmony. Think of it as curating your personal coastline.
Caring for and maintaining your seascape wall art
Keep your seascape wall art looking brilliant by giving it a little care now and then. First off, hang it where the sun doesn't hit directly. Sunlight fades colors over time. Dust it lightly with a microfiber cloth; this type doesn't scratch. For glass-covered pieces, a bit of glass cleaner on a cloth works wonders, but spray it on the cloth first, not directly on the glass. If your artwork isn't under glass, avoid using liquid cleaners. A dry brush will get rid of dust without hurting the painting. Got a canvas piece? Keep it away from damp areas to prevent mold. Remember, maintaining your seascape wall art isn’t hard. A few simple steps ensure it remains a vibrant reminder of the coast for years to come.
Where to find quality seascape art pieces
Finding quality seascape art pieces might sound daunting, but it's actually quite straightforward once you know where to look. Start by browsing local galleries. These places often showcase works by local artists, giving you a unique take on seascapes. Next, don't shy away from online marketplaces. Websites like Etsy or Saatchi Art offer a wide range of options, from affordable prints to original paintings, all with the click of a button. Remember, the reputation of the seller is crucial, so read reviews. Art fairs and exhibitions are another gold mine. They not just present you with a variety of styles but also offer the chance to interact with artists directly, adding a personal touch to every piece you consider. For those who value convenience, high-end furniture stores often carry a selection of curated art pieces, including stunning seascapes. While exploring these venues, focus on work that speaks to you. After all, you want a piece that brings the coastline right into your living room, not just another picture on the wall.
Conclusion: Bringing the beach home with seascape wall art
Bringing the beach home with seascape wall art isn't just about decorating; it's about reviving those sun-soaked memories and the calm you feel with every wave. It's about creating a space in your home that echoes the serenity and beauty of the coast. Whether you choose a vibrant sunset painting or a tranquil photo of the morning tide, each piece serves as a window to your favorite coastal memories. Seascape wall art is an affordable way to keep the essence of the beach alive, even when you're miles away. It reminds us that although vacations end, the feelings and memories can linger on our walls, becoming a part of our daily lives. So, hang a piece of the ocean in your room and let it take you back to those lazy days by the sea, anytime you wish.
The Emotional Impact of Ocean Imagery in Home Decor
Introduction to Seascape Wall Art in Home Decorating
Seascape wall art isn't just a decoration; it's a vibe. Imagine waking up to the soothing blues of the ocean or the serene sunset over the water, right in your living room. This kind of decor pulls the vastness and the calming effect of the sea into your home. It's more than just hanging a picture; it's a way to bring a bit of peace and tranquility into our often too busy lives. Whether it's a single large canvas that captures the ocean's magnitude or a series of smaller prints that showcase the sea's varying moods, incorporating seascape imagery can significantly impact anyone stepping into the room. It sets a tone, maybe of adventure, relaxation, or pure awe. Not to mention, it's a versatile choice that can blend with minimalistic, modern, or even rustic interiors. In short, seascape wall art is more than just home decor; it's a mood enhancer and a style statement rolled into one.

The Psychological Effects of Ocean Imagery in Living Spaces
Ocean imagery in living spaces does more than just add a pretty picture to your walls. It has real effects on your mind and mood. The colors and scenes of the ocean can calm your nerves and boost your happiness. Think blue skies, rolling waves, and sandy beaches. Those scenes can help drop your stress levels. Also, ocean pictures can increase your focus and creativity. It’s about the vast, open spaces that make you think bigger and feel more creative. Plus, having pictures of the ocean around can make you feel more connected to nature, even when you're stuck inside. This connection is key for feeling grounded and at peace. So, adding some ocean imagery to your home isn't just about decoration; it’s about making your home a happier, calmer place to be.
How Seascape Wall Art Can Transform a Room's Atmosphere
Seascape wall art isn't just a picture. It's a vibe changer. Imagine walking into a room and feeling the calm of the ocean or the power of stormy seas. That's what ocean imagery does. It pulls you into a different headspace. Seeing the endless sea or a peaceful beach scene on your wall can sweep stress away, just like waves wash over footprints in the sand. It’s about more than beauty; it's about feeling. Put a seascape in a room, and watch the space become a spot where tension fizzles out. Bright, sunny beaches bring in light and warmth, turning a dull spot into your happy place. Dark, stormy ocean scenes? They add drama and depth, making your room feel like a story waiting to unfold. Every picture tells a tale, and with ocean imagery, it's always a tale worth diving into. Seascape wall art is an easy way to pour a bit of that ocean magic into your day-to-day surroundings.
The Connection Between Ocean Imagery and Relaxation
Ocean imagery in your living space isn't just a design choice. It's a gateway to a calmer mind and a relaxed body. Ever wonder why a quick glance at a sea photo can take your stress levels down a notch? It's all about the connection between our brain and the blue expanses of the ocean. This visual cue triggers a response in our brain that says, "It's chill time." Think about the sound of waves crashing or the sight of water stretching to the horizon. These elements inherent in ocean imagery have a powerful effect on our mental state. They slow our heartbeat, relax our muscles, and tell our busy minds to take a breather. In short, incorporating ocean imagery into home decor does more than beautify a room. It creates a sanctuary of peace, helping us unwind after a hectic day. So next time you find yourself mesmerized by a picture of the sea, know it's your body responding to nature's own version of a reset button.
Incorporating Seascape Wall Art for Positive Mental Health
Bringing the ocean into your home with seascape wall art isn't just about creating a beautiful space; it's a smart move for your mental health. Yes, staring at an ocean scene can actually make you feel calmer and more relaxed. It's like a mini-vacation for your brain every time you look at it. Scientists say that blue spaces, including ocean views, can lower stress and improve mood. So, when you hang a piece of ocean art on your wall, you're not just decorating; you're making a space where your mind can chill out. And here's the best part: you don't need to live by the sea to get these benefits. Any ocean imagery can have a positive effect. Whether it's a vibrant sunrise over the water or a serene beach at sunset, these scenes can boost your happiness and reduce feelings of anxiety. If you've been feeling a bit down or stressed, consider adding some seascape art to your home. It's an easy way to help your mind find a bit of peace in the chaos of daily life.
Choosing the Right Seascape Imagery for Different Rooms
When picking out ocean images for your rooms, think about the mood you want to create. A serene beach at sunrise brings calm, perfect for bedrooms or study spaces. For a living room or communal area, vibrant beach scenes with people and action add energy. In bathrooms, consider underwater scenes or clear, blue waters for a fresh feel. Remember, the purpose of the room guides your choice. Darker, stormy ocean pictures might suit personal spaces for reflection or a home office. Choosing the right seascape isn't just about the image but how it makes that room feel.
The Role of Color and Composition in Seascape Art
Colors and how they're arranged in seascape art aren't just random choices. They play a huge role in how we feel when we look at these images. Light blues and greens tend to calm us down, making us feel more at peace. It's like the ocean's way of saying, "Relax, you're in good hands." On the other hand, dark stormy blues and grays can stir up feelings of awe and respect, sometimes even a touch of fear—reminding us of nature's power. The way elements are set in the picture also matters. A wide-open sea with a clear horizon can make you feel free and limitless. But, throw in some crashing waves against rocks, and suddenly, there's a sense of drama and conflict. These choices that artists make about color and composition directly touch our emotions. They transform a simple decor item into something that can change the vibe of the whole room.
Creative Ideas for Displaying Seascape Wall Art in Your Home
Ocean imagery has a calming effect that can bring a slice of seaside serenity into any room. Here's how to make the most of seascape wall art in your home. Start by considering the mood you want to create. A vibrant, colorful beach scene adds energy and joy, perfect for living rooms or kitchens. Photos of calm, misty shores can transform bedrooms into tranquil retreats. Don't limit yourself to standard frames. Think about canvas prints for texture or even large, frameless pieces for a modern look. Placement is key. Hang a large seascape in your living room where it can be a focal point, or use smaller pieces to create a gallery wall in a hallway. Mixing in seashells or beach-themed decor can enhance the ocean vibe. Remember, the goal is to bring the feel of the ocean into your home in a way that suits your style and space.
Maintaining the Calm: Caring for Your Seascape Wall Art
To keep your seascape wall art looking as fresh and calming as the day you hung it, there’s a bit you’ve got to do. First, remember to keep it out of direct sunlight. Sun rays are great for tans, but terrible for art. They can fade those vibrant blues and serene whites until your ocean looks more like a desert. So, hang your piece where it gets some shade. Next up, dust gently. Use a soft, dry cloth and just lightly brush over the surface. Don’t press too hard, or you might damage the canvas or the frame. And please, avoid using water or cleaning solutions—even if it's a picture of water. Moisture is not a friend here. If your art is glass-covered, a bit of glass cleaner on a cloth can do wonders, but spray it on the cloth, not directly on the glass. Lastly, consider the climate in your room. Too much humidity can warp the frame or create mold. Keep things cool and dry. By following these simple steps, you’ll ensure your ocean imagery stays as tranquil and captivating as it's meant to be.
Conclusion: The Lasting Impact of Ocean Imagery in Home Decor
Ocean imagery in home decor does more than just make a room look good. It can actually change how you feel. From calming blues to lively depictions of sea life, ocean-themed decor can bring a sense of peace and adventure into your home. It's about creating a space where stress takes a back seat and relaxation is your co-pilot. Whether it's a large painting of the ocean that serves as a room's focal point or small sea-themed accessories scattered around, these elements remind us of the vastness of the ocean and the possibilities life holds. Investing in ocean imagery for your home isn’t just about following a trend; it's about embracing a lifestyle that prioritizes wellbeing and openness. The lasting impact? A home that feels like an escape, a personal sanctuary that connects you to the natural world in a profound way.
If you're thinking about adorning your walls with aquatic scenes and surf inspired imagery, be sure to checkout some of my limited collections.
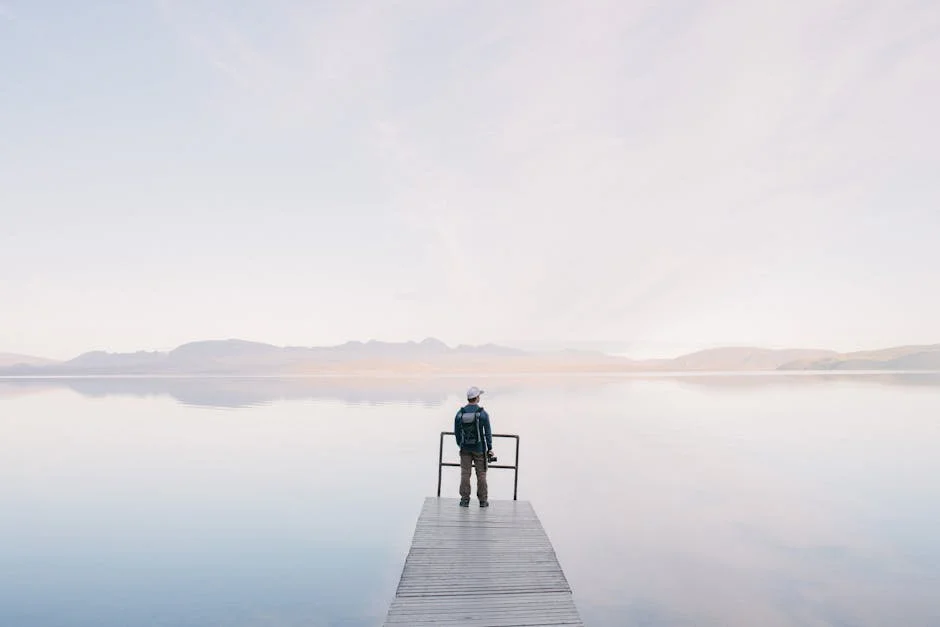
Essential Gear for Beach Landscape Photography: What Every Photographer Needs
Introduction to Beach Landscape Photography
Beach landscape photography is more than just taking pictures of the sea and sand. It's about capturing the essence of the seaside - the mood, the light, the textures, and the colors that make every beach unique. Whether you're a beginner or an experienced photographer, understanding what makes beach photography special will help you take your photos to the next level. Beaches offer a natural canvas that changes with the time of day and season, offering endless opportunities for stunning photos. The key is to capture not just the scene but also the feeling of the beach. This means paying attention to details like the pattern of the waves, the play of shadows, and the dance of light across the water. Remember, beach landscape photography is an adventure in observing and capturing the beauty that surrounds us by the shore.

Choosing the Right Camera for Beach Landscapes
When capturing beach landscapes, the camera is your ultimate weapon. So, choose wisely. You don't need the latest or the most expensive model. What matters most is a camera that offers manual controls and good image quality. DSLRs and mirrorless cameras are popular choices for their versatility. For stunning beach shots, consider a camera with a high dynamic range to capture the sky and sea’s vast contrasts. Weather sealing is a plus because beaches can be windy and sandy. Remember, the best camera is one that fits your budget and meets your needs. Get to know your camera inside and out, and let the creativity flow. If you want to know more about my own gear, feel free to send me an email/DM--looking to write more about my setups in the future, as well.
The Importance of Lens Choice in Capturing the Shoreline
When it comes to beach landscape photography, your lens choice is critical. It's like picking the right fishing rod for the sea; not just any will do if you aim to catch the beauty of the shore. Wide-angle lenses are the go-to for most beach photographers. They let you capture the vastness of the beach, the stretching sand, and the endless horizon—all in one shot. Think of it as trying to get all your friends in a selfie; a wide-angle lens makes sure no one's left out of the frame. But let’s not forget the power of telephoto lenses for those distant shots. Want to capture the crisp details of waves crashing against rocks from afar without getting your gear wet? A telephoto lens has your back, zooming in on the action without losing clarity. Remember, the mood, the detail, and the breadth of your beach landscapes heavily depend on the lens you choose. So, picking the right one isn't just important—it's essential. Make your lens choice a top priority and watch your beach photos go from good to breathtaking.
Tripods and Stability Equipment for Sharp Images
When shooting beach landscapes, achieving sharp images is crucial. That's where tripods and stability equipment come into play. A sturdy tripod eliminates camera shake, especially important during those long exposure shots capturing the smooth motion of the sea or the fleeting light at dawn and dusk. Avoid the cheapest options. You want a tripod that can stand its ground against coastal winds. Also, consider a tripod made from carbon fiber. It's light to carry on sandy beaches and resistant to corrosion from salt water. Beyond tripods, think about getting a remote shutter release. This little gadget lets you take photos without touching your camera, further reducing the risk of shake. Remember, in photography, stability equals clarity. Keep it simple, steady, and sharp.
Filters: Enhancing the Coastal Light
When you're out capturing the coast, light can be tricky. It's all about getting that perfect shot without the glare ruining your masterpiece. Here's where filters step in – they're the unsung heroes for beach photographers. Think of Polarizing filters first. They cut down the glare from water and wet sand, making the colors pop and giving the sky a dramatic contrast. It's like sunglasses for your camera, really. Then there are Neutral Density (ND) filters, crucial for those wanting to play with slower shutter speeds. They let you smooth out water or capture movement in the clouds, even in bright daylight, without overexposing your shot. Graduated ND filters take it a step further, perfect for balancing the bright sky with the darker land or sea. Remember, it's not about having all the gear but knowing how to use what you've got. Filters can turn a good photo into a great one, with a bit of know-how.
Protecting Your Gear from Sand and Water
When you're out shooting beach landscapes, sand and water are your biggest enemies. But, don't panic. A few simple steps can shield your precious gear from these elements. First, always have a good camera bag. It's not just for carrying; it's for protection. Opt for bags that are waterproof or have weather-sealing features. This is a game-changer. Then, lens filters. They aren't just for effects; they protect your lens from scratches and sea spray. Think of them as a shield. Lastly, never underestimate the power of silica gel packets. Toss a bunch in your bag--I keep pairs of reusable ones in each of my camera bags that can be reactivated, in hopes to reduce on waste. They suck up moisture like a sponge, keeping your equipment dry and happy. Remember, a little preparation goes a long way in keeping your gear safe from sand and water's clutches.
Essential Accessories for Beach Photography
When you're out on the beach aiming to capture those breathtaking landscapes, a few key accessories can make a big difference. While I'm not always one to shoot from the beach, a sturdy tripod is non-negotiable. Beach winds can be unpredictable, and a good tripod keeps your camera steady, ensuring sharp images. Next, a circular polarizing filter (CPL). This gem reduces reflections and glare, making the water look clearer and the sky bluer. It's like sunglasses for your camera. Don't forget lens cloths. Salt spray and sand get everywhere. A few quick wipes keep your lens spotless for crystal clear shots. Lastly, bring extra batteries and memory cards. The last thing you want is your camera dying or running out of space as the perfect sunset begins. With these essentials in your bag, you're well-equipped to capture the beauty of the beach.
Packing Tips for Beach Photography Expeditions
When heading out for beach photography, packing light yet smart is key. You want to capture the beauty without being weighed down. First, always pack your camera and lenses in a waterproof bag—saltwater and sand are enemies to your gear. A sturdy tripod is a must-have for those crisp, clear shots, especially during sunrise or sunset. Don't forget to include lens cleaning materials; beaches are windy, and you’ll likely need to clean your lens more than once. A protective UV filter can also save your lens from those harsh beach sun rays. Considering the unpredictable nature of the beach, bring along plastic bags or rain covers to protect your gear from sudden splashes or rain. If you're planning to stay till twilight, a flashlight or headlamp will be your best friend. Lastly, extra batteries and memory cards are non-negotiable. You don’t want to miss capturing a moment due to a dead battery or full card. Pack smart, and you’re all set for a productive day of beach photography.
Understanding the Best Times for Beach Landscape Shots
The golden hours are your best friends for beach landscape shots. Right after sunrise or just before sunset, the light is softer, warmer, and brings out the vibrant colors of the sky and sea. During these times, you avoid the harsh shadows and overly bright highlights of midday sun. Remember, every beach is different. East-facing beaches glow at sunrise, while west-facing beaches bask in the sunset. Don't forget about the blue hour, that time just before sunrise and just after sunset, for shots filled with cool, serene tones. Play around with these times, and you'll see how they dramatically change the mood of your photographs.
Conclusion: Preparing for Your Next Beach Photography Adventure
Wrapping up, gearing up for beach photography means thinking beyond just your camera. A sturdy tripod can be your best friend against the sand and wind. Don't forget filters to manage that bright sunlight and to add drama to your skies and waters. A protective bag or case becomes crucial to shield your gear from salt and sand. And, remember, patience and practice play a big role in capturing those stunning beach landscapes. So, pack your bag with these essentials, head to the beach, and get ready to capture the beauty of the coast in your own unique way. Happy shooting!
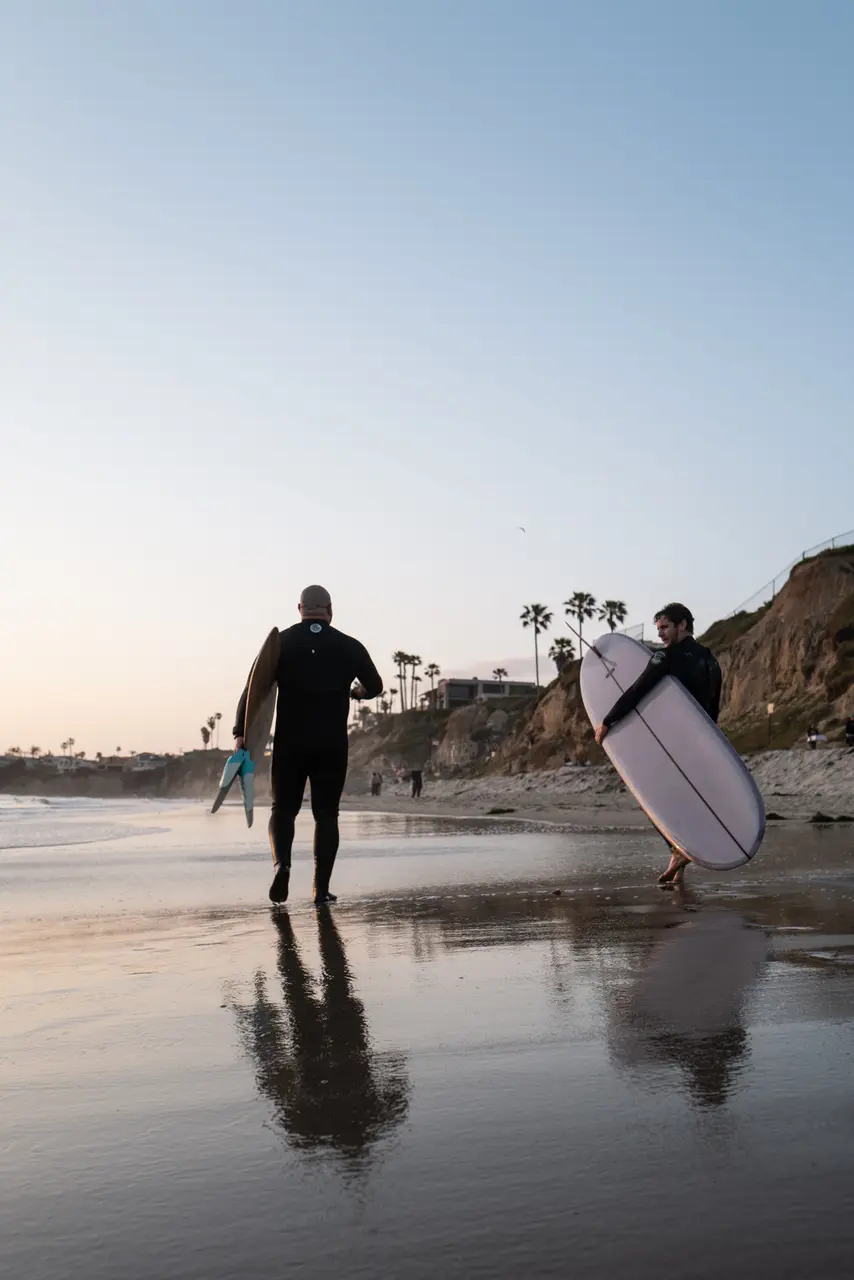
10 Tips for Capturing the Perfect Beach Landscape Photography
Choosing the Right Time for Beach Landscape Photography
Capturing the perfect beach landscape isn't just about a good camera or a keen eye for details—it's also about timing. You might think any time is good if the beach looks stunning, but not all hours are equal for photography. Early morning and late afternoon are golden. Literally. These times offer what photographers love to call the "golden hour." It's when the sun is low in the sky, creating soft, diffused light that brings out the beauty in the landscape without harsh shadows or overexposure. So, aim to shoot within the hour after sunrise or the hour before sunset. Besides the ideal lighting, beaches are less crowded during these times. This means you can capture the serene beauty of the sea without photo bombers. Trust me, waking up early or waiting for the sunset can make a massive difference in your beach photography.

Understanding Light and Its Impact on Beach Scenarios
Light is everything in photography, especially at the beach. The time of day changes the whole game. Shoot early in the morning or late in the afternoon when the sun is low. This golden hour gives your photos warm tones and long shadows that add depth and interest. Avoid midday when the sun is harsh, and shadows are short, making everything look flat. Watch how light plays with water, creating sparkles in the morning or a smooth, reflective surface during sunset. Different weather brings unique lighting conditions too. Overcast days might seem dull, but they offer soft, even light that can make your beach photos look stunning without the harsh shadows. Remember, mastering light takes practice. Keep experimenting at different times and in various conditions to see how light changes your beach landscapes.
Composition Techniques for Stunning Beach Shots
To take your beach photos from good to breathtaking, focusing on your composition is key. Here's how to frame those beach scenes for impact: Rule of Thirds is your best friend. Imagine your image divided into nine equal parts by two equally spaced horizontal lines and two equally spaced vertical lines. Place points of interest in your scenes along these lines or at their intersections. This technique creates a balanced and interesting shot. Leading Lines can guide the viewer's eyes through the photo. Use the natural lines of the beach, like the shoreline or a jetty, to draw attention towards your main subject. Foreground Interest adds depth to your shots. A piece of driftwood, footprints in the sand, or a rocky outcrop in the foreground makes your image more engaging. Symmetry and Reflections provide a different perspective. Use the calm water at sunrise or sunset to capture the reflection of the sky or a landmark. This adds a layer of tranquility and doubles the beauty of the scene. Focus on these composition techniques, and you'll capture the essence and beauty of the beach in a way that grabs attention and evokes emotion.
The Importance of the Horizon Line in Beach Photography
In beach photography, placing the horizon line is key. Get it wrong, and your photo feels off; nail it, and your picture sings. It's not just about slicing the scene in half. Think of the horizon line as the anchor of your shot. Too high or too low, and your photo lacks balance. Here's the deal: placing the horizon in the upper third of the photo emphasizes the foreground, perfect for captivating details in the sand or waves. On the flip, dropping it to the lower third lets the sky take center stage, ideal for dramatic sunsets or cloud formations. But remember, a wonky horizon is a big no. It screams carelessness. Always aim for a level horizon; it's the baseline for a solid beach photograph. In short, mastering where you place the horizon line can drastically impact the vibe of your beach shots. Play around, but keep it balanced and straight.
Capturing Movement: Water, Wildlife, and Clouds
Capturing movement in beach photos brings them to life. Think waves, birds, or clouds zooming across the sky. First up, waves. They're unpredictable. Sometimes calm, sometimes wild. Want that silky water look? Set your camera to a slow shutter speed, like 1/15 of a second. Holding that camera steady is key, so maybe bring a tripod. For wildlife, patience is your best friend. Birds don’t take directions. Stay ready, camera in hand, and wait for the perfect shot. Fast shutter speeds are your go-to here. They freeze the bird's wings mid-flap, making your photo pop. Clouds, though, are a different game. Look for moments when the sky is dramatic. Clouds moving fast? Use a slower shutter speed to capture their flow. Or, if you want sharp, defined clouds, speed it up. Remember, lighting can change the game. Early morning or late afternoon, that's your golden window. Soft, warm light makes everything look better. So, next time you're at the beach, play with these tips. Waves, wildlife, clouds - capture their motion and watch your photos come alive.
Essential Gear for Beach Landscape Photography
When you're heading to the beach with your camera in hand, aiming to capture the essence of the landscape, make sure you're carrying the right gear. Good beach photography starts with the basics: a sturdy camera and a versatile lens. But there’s more to it. First, think about a polarizing filter. It cuts through the glare on the water and sand, making the sky bluer and the clouds pop. Next, a tripod is non-negotiable. It stabilizes your camera, essential for those long exposure shots that make the water look silky smooth. Also, consider a wide-angle lens. It captures more of the scene, giving a sense of vastness to your beach photographs. Don't forget about the cleaning kit. Beaches mean sand and salt, both of which can harm your gear. Lastly, spare batteries and memory cards. You don’t want to run out of power or space when that perfect shot shows up. Armed with this gear, you're ready to take beach landscapes that stun and awe.
Utilizing Filters for Enhanced Beach Photos
To take your beach photos from good to breathtaking, think about using filters. Yes, filters. They're not just digital add-ons in your favorite photo app; real, physical filters you attach to your camera lens can make a massive difference. Let's break it down. Polarizing filters should be your go-to for beach photography. They cut down the glare from water and sand, making the blue of the sky and the ocean pop like you wouldn't believe. It's like putting sunglasses on your camera, but better. Then there's the Neutral Density (ND) filter, a must-have for capturing silky smooth water or clouds. This filter limits the amount of light entering your lens, allowing you to use a longer exposure without overexposing your shot. It's perfect for creating that dreamy, flowing effect in daylight. Graduated ND filters are another game-changer. They're dark on top and gradually become transparent at the bottom. Aimed at balancing the bright sky and darker land or sea, they ensure your shot is evenly exposed. Simple, right? Pop these filters on when the scene's too dynamic in terms of light, and watch the magic happen. Remember, it's not about having all the fancy gear but knowing how to use what you have to its full potential. Filters can help you do just that, capturing beach landscapes that truly stand out.
Exploring Different Perspectives and Angles
When you're snapping photos of the beach, don't just stick to the eye-level shots everyone else is taking. Mix things up. Get down low for a unique perspective that makes the sand seem endless or climb up high to capture the broad expanse of the ocean meeting the sky. Try tilting your camera for a dynamic angle that adds life to the waves. Each different angle tells a different story of the beach. Experiment with shots that include nearby rocks, or frame the scene through foliage or driftwood. This approach isn't just about getting creative; it's about capturing the essence of the beach from viewpoints most people overlook. Remember, the best shot might just come from where you least expect it.
The Role of Post-Processing in Beach Photography
After you've done the hard work of capturing your beach shots, post-processing plays a crucial role in turning good photos into great ones. Think of it as fine-tuning. You adjust colors to make the blues of the ocean deeper and the sand's warmth pop. Shadows and highlights can be balanced to ensure the sky isn't washed out or the landscape too dark. Sometimes, the raw camera shot doesn’t do justice to the scene's true beauty. This is where your editing skills come into play. Soften harsh lights, sharpen blurred edges, or even remove unwanted objects that snuck into your frame. Remember, the goal is to enhance, not alter the scene's reality. Use tools like Lightroom or Photoshop, but keep edits natural. Your post-processed photo should still feel real and authentic, capturing the essence of that perfect beach moment.
Learning from Common Mistakes in Beach Landscape Photography
Even the most seasoned photographers can slip up when shooting beach landscapes. First off, many forget about the timing. The best beach photos come during the golden hour, right after sunrise or just before sunset. The light is softer, and the colors are vibrant. Another common mistake? Ignoring the horizon line. A crooked horizon can throw off an entire picture. Always ensure it's level. Then there's the sin of clutter. Beaches can be busy places. Aim for simplicity in your compositions to capture the essence of the beach without all the chaos. Overlooking the importance of a focal point is another error. A photo without a clear subject can feel aimless. Find something interesting - a rock, a pier, a person - to draw the viewer in. Lastly, many fail to protect their gear. Sand and salt are enemies of camera equipment. Always clean your gear after beach shoots. Learning from these slip-ups can dramatically improve your beach photography game.

Top Locations for Breathtaking Seascapes Photography in San Diego
Introduction to Seascapes Photography in San Diego
San Diego isn't just sunny skies and taco stands; it's a dream for photographers hunting for perfect seascapes. The coastline stretches, offering a palette of blues and rugged shores that beg to be captured. Whether you're a seasoned photographer with gear worth more than your car or a hobbyist with just a phone, San Diego's shores have something for you. In this part of the world, every sunrise and sunset paints a unique picture on the water, with waves crashing against cliffs or rolling gently onto sandy beaches. We'll dive into spots where you can catch these scenes at their best. Get ready to explore hidden gems and popular locales alike, where every shot tells a different story of the sea's timeless allure.
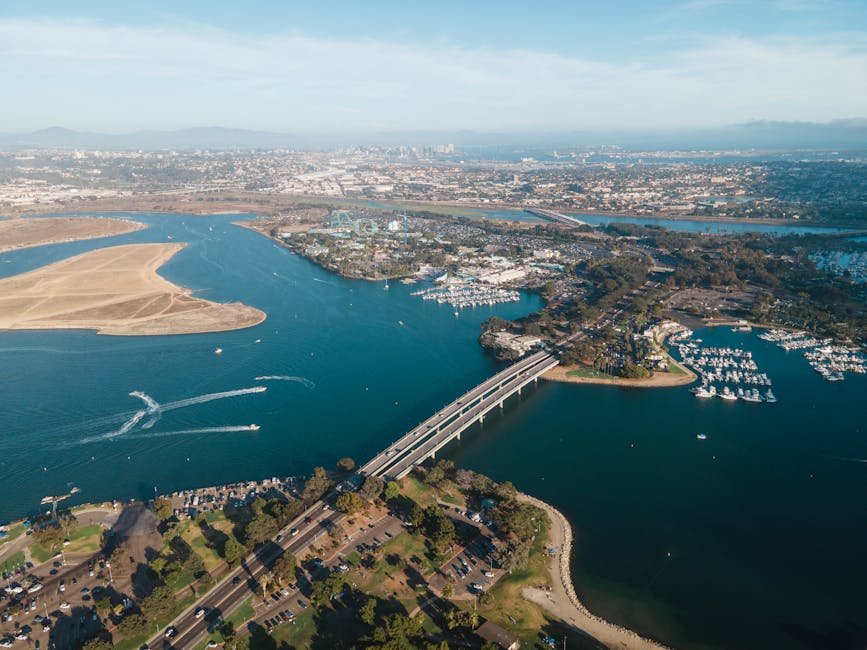
Best Time of Year for Seascapes Photography in San Diego
San Diego's sunny weather might trick you into thinking any day is good for seascape photography, but not all days are equal. For stunning photos, aim for the golden hours – early morning or late afternoon. This time gives you soft, magical light perfect for capturing the ocean's beauty. But if we talk seasons, spring and fall stand out. Why? Fewer crowds, for one. You'll get clean shots without a bunch of strangers in your frame. Plus, the weather is just right – not too hot, not too chilly. And let's not forget the sunsets during these seasons; they're something else. Their colors paint the sky in ways that can make any photo pop. So, pack your gear when the leaves start changing or when the flowers begin to bloom. That's your window for capturing San Diego's seascape at its best.
La Jolla Cove: A Photographer's Paradise
La Jolla Cove is a gem for photographers aiming to capture the essence of the ocean's beauty. Nestled in San Diego, this small beach is surrounded by cliffs and offers stunning views of the Pacific. The water is clear, making it perfect for snapping shots of the vibrant marine life. Whether you're into sunrise or sunset photography, La Jolla Cove delivers. The golden hours bring out the best colors and textures in the sea and sky. Plus, the sea lions and seals lounging on the rocks add a lively touch to your photos. Remember, the lighting can change fast, so it's all about timing and patience here. This spot is a must-visit for any photography enthusiast in San Diego.
Sunset Cliffs Natural Park: Capturing the Golden Hour
Sunset Cliffs Natural Park is a must-go for anyone chasing the perfect shot of the golden hour. The place lights up with fiery hues as the sun dips, painting the sky and the ocean. Here's the thing: get your camera ready because this spot offers some of the most dramatic backdrops you can find in San Diego. What makes it stand out? The cliffs. They give you a mix of danger and beauty, all in one frame. Think rugged coastlines, crashing waves, and that magic glow as the sun sets. Pro tip: explore different angles. The park is big enough for you to find your unique view, away from the usual crowds. Remember, the golden hour waits for no one. So, timing is key! Get there a bit early, find your spot, set up, and be ready. This isn't just about snapping pictures; it's about capturing a moment that feels almost out of this world.
Torrey Pines State Natural Reserve: Where Land Meets Sea
Torrey Pines State Natural Reserve isn't just any spot; it's where the rugged cliffs drop to meet the endless blue of the Pacific Ocean, offering a spectacular view that's perfect for photographers aiming to capture the essence of the coastline. Here, you've got a mix of rough terrain, native pines, and a vast expanse of water that changes hues with the sky, making it an epic scene at sunrise or sunset. The beauty of this place isn't in the details, but in the grand, sweeping landscapes that stretch out before you. While you're there, keep an eye out for the rare Torrey pine tree, exclusive to this area, adding an extra layer of uniqueness to your shots. Just remember, it’s a protected area, so stick to the paths and leave no trace. Bring your camera gear, respect the land, and get ready to capture some of the most breathtaking seascapes in San Diego. Whether you're a seasoned photographer or just starting out, Torrey Pines State Natural Reserve is a location you shouldn't skip.
Coronado Beach: Iconic Views of the San Diego Skyline
Coronado Beach stands out as a top spot for photographers aiming to capture San Diego's essence. The beach offers iconic views of the San Diego skyline, making it perfect for those who love to blend natural beauty with urban landscapes. The best times to shoot are early morning or late afternoon when the light casts a golden hue over the city, creating stunning contrasts. Don't forget to explore different angles and compositions, including the famous Hotel del Coronado as a backdrop. Whether you're a professional photographer or just starting, Coronado Beach won't disappoint. Remember, the magic lies in patience; sometimes, waiting for the right light can turn a good photo into a breathtaking one.
Ocean Beach Pier: A Unique Perspective on the Pacific
Ocean Beach Pier offers a unique angle on the vast Pacific, setting it apart as a prime San Diego seascape photography location. Its lengthy structure juts well into the ocean, allowing photographers to capture both the dynamic ocean waves and serene sunsets with a distinct backdrop of the pier itself. This spot is not only about the stunning views; it's about the ambiance. Early mornings or late afternoons are the golden hours here, with the sun casting a warm glow that makes the water sparkle. Whether you're aiming to catch the surfers in action, the pelicans gliding by, or the play of light on the water, Ocean Beach Pier has it all. Remember, the pier's unique positioning means you can get shots that are impossible from the shore. So, bring your camera and let the pier guide your lens for a perspective on the Pacific like no other.
Cabrillo National Monument: History Meets Natural Beauty
At the Cabrillo National Monument, history and natural beauty collide, offering photographers a unique opportunity to capture the essence of San Diego's scenic seacoast and its rich historical backdrop. This place isn’t just about beautiful seascapes. It’s where 16th-century explorer Juan Rodriguez Cabrillo first landed on the West Coast of the United States. As you stand on the rugged shores, you're standing where history was made. The monument offers panoramic views of the Pacific Ocean, downtown San Diego, and the surrounding mountains, making it a photographer's dream. The area is most stunning during the golden hours, when the light casts a magical glow over the landscape. Remember, it's not just about the sea; it's also about the stories the place holds. Capture both, and your photos will speak volumes.
Crystal Pier in Pacific Beach: Underwater Photography Hotspot
Crystal Pier, standing tall in Pacific Beach, isn't just a pier. It's an underwater realm of fantasy for photographers. The spot is a magnet for those aiming to capture the mesmerizing life beneath the waves. Here, the clarity of the water teams up with a rich display of marine diversity, making it not just a dive but an exploration. Imagine clicking shots of vibrant fish darting around, the calm sway of seaweed, and the occasional curious sea turtle glancing at your lens. The best part? It's accessible. You don't need to be a pro diver to immerse yourself in this aquatic adventure. Just gear up and dive in. Remember, the golden hours at sunrise and sunset bring out the true magic of Crystal Pier's underwater scenery. Light dances through the water, painting everything in hues of gold and blue - a spectacle your camera yearns to capture. So, whether you're aiming for that serene shot of marine life in their natural ballet or the dynamic play of light beneath the waves, Crystal Pier awaits.
Tips for Perfecting Your Seascapes Photography Skills
To nail those jaw-dropping seascapes shots in San Diego, start by mastering the basic rules of composition like the rule of thirds, leading lines, and framing. These techniques help give your photos depth and intrigue. Early mornings and late afternoons are golden for photographers due to the soft, warm light. This time, known as the golden hour, brings out the textures and colors in the landscape. Don't shy away from using a tripod. The stability it provides is especially vital for capturing sharp images in low light conditions or when aiming for that silky water effect with long exposures. Experiment with different shutter speeds. A faster shutter freezes the action of waves, while a slower shutter speed creates a smooth, dreamy look. Lastly, always protect your gear from the salty sea spray and consider using a polarizing filter to reduce glare and enhance the blues of the sky and ocean. Dive in, practice, and watch your seascapes photography skills soar.
The Healing Power of Travel: A Fiji Retreat for Mental Health
The Healing Power of Travel: A Fijian Retreat

A journey that starts and ends with a breathtaking helicopter ride: here is the aerial view inbound to the lagoon of Likuliku Resort

One of the many ways to reach Likuliku from Nadi is by chartering a helicopter flight.

Island hopping via helicopter
If you’ve found this via my long format/youtube channel , thanks for checking out the rest of my work. If you’d like to see a summary edit of this trip, be sure the check out part 1 and part 2. As always, I appreciate the opportunity to earn your continued support by subscribing to my channel and regularly checking out this blog.
In a world that sometimes feels overwhelming and fast-paced, the healing power of travel can be transformative. It's a potent elixir for the soul, a reminder that there's a profound connection between the places we visit and our mental well-being. Our journey to Fiji, a place of pristine beauty and profound serenity, revealed the true essence of this transformative power.
Honeymoon Revisited: Five Years Later

Staying in the very private and scenic over the water bure proved to be the highlight of our first visit in 2018.


Five years ago, we embarked on a journey to Fiji for our honeymoon. I consider myself a seasoned traveler and professional at blending vacation and adventure—despite what you might think, these are not synonymous. Having visited dozens of oceanic destinations—from the coastline of Japan, the Philippines, and even Indonesia—our first visit to Fiji reshaped our view of travel. To be brief, our intentions to return to this part of the South Pacific would be vital to our well-being.
Keeping our goals in sight, in 2023, we celebrated our five-year wedding anniversary by returning to the Mamanuca islands. In the heart of the South Pacific, we found Likuliku Lagoon Resort, a hidden gem nestled on a private island. The mere sight of this paradise, framed by lush palm trees and caressed by the turquoise embrace of the Pacific Ocean, is a balm for any weary souls.
Beneath the Waves: World-class Snorkeling
Certainly an abundance and variety of ocean dwellers. These Black Tip Reef sharks hang around the posts and coral nearest the pier. Tried my best to keep good distance, but these little guys had big puppy energy.
Schools of tropical fish surround the waters of the lagoon.

Plenty of sea life to seek out near the welcoming pier of the resort at Likuliku.
Island-Hopping Adventures: Monuriki Island and Mociu (Honeymoon Island)
Our inaugural visit to Likuliku was spent mostly in our over-the-water bure, where we could see the sea life from our own private viewing deck and a glass bottom floor—in between the opulent treatment and snacks, we simply walked the grounds—respite from our former lives in DC, an celebration of our then recent nuptials, and preparation for the rest of our trip to New Zealand.
The focus of our trip in 2023 was to take advantage of the excursions that could be had from Likuliku. Borrowing a Hobie Cat and kayaks can be quickly arranged at their activities bure—even scuba diving lessons and outings can be booked for those looking to get a closer glimpse of the active reefs. On my next visit, I plan on building out projects that will allow me to focus on my surfing and surf photography—world class breaks are but a short boat ride from Likuliku.
Traveling as a couple means focusing on activities we can both enjoy and the resort makes booking outings such as island hopping as simple as ordering your breakfast. One of our island-hopping adventures led us to Monuriki Island, a place etched in cinematic history as the backdrop for "Cast Away." Here, nature's serenity enveloped us. The lush forests, panoramic vistas, and the enchanting calls of native birds became our companions in solitude. We discovered that nature, in its unspoiled splendor, can be a salve for the weary mind.

Monuriki Island, known for being the backdrop for “Cast Away” with Tom Hanks

On our last morning, we were fortunate enough to book a visit to Mociu private island, better known as Honeymoon Island. To see the sunrise, we met at the boat launch well before the sun came up and were warmly greeted by Ben and the crew. QUICK NOTE: Ben has great stories to tell, is a veteran, family man, seasoned waterman—all the staff at Likuliku make the experience of visiting their home…home.
Its a straight shot (in the dark) from the boat launch over to Mociu Island. After a brief and steep hike through some brush, we were blessed with easily the most breathtaking sunrise and a view of Malolo and the surrounding islands. (The champagne breakfast at the top was very welcomed.)


Witnessing Cloudbreak's Majesty

You’d think that the focus of this whole note was to highlight some serious surfing. Spoiler: it was not. The swell had not filled in at that point in May, and we were early by about a week. Nevertheless, I was beckoned to see Cloudbreak, Fiji's renowned surf mecca, for myself. It wasn't about conquering the waves this time; it was about bearing witness to the ocean's raw, untamed power. I’ve seen open water before, and despite the swell not being what I envisioned, the waves thundered and crashed in awe-inspiring displays of nature's force—beyond what I had ever experienced. The lack of surfers and other boats around was a telling sign. We did a jaunt over to Tavarua and didn’t spot a single soul. The crew knew the current was strong and the lack of clarity would keep us out of the water—so we opted to view some monstrous sets from the safety of the boat. It was a humbling few hours and a reminder of the vastness and unpredictability of our world.
Versa and veritas:
I’m still getting the hang of trying to stay true to this blog work—I could say so much about this past trip to Fiji. In the end, it was largely an intimate excursion, so I’ll abstain from droning on and retain the integrity in that manner. Future blogs and long format work related to my projects will have a different tone and highlight endeavors with more intention.
If you are interested in seeing more photos from this 2023 trip, checkout the Pixie site I created for Likuliku.
https://photophilproductions.pixieset.com/likuliku_fiji2023/
Coasting Forward.
My intention with traveling to these surf meccas is to blend project work and leisure—I want to really lean into this life. This past year would have been considered a test to see how the logistics around this lifestyle could be managed. After taking some time to assess my path, I'm excited to announce that I am refocusing my craft on surf photography and documentary work. This passion has always been at the core of my artistic journey, and I am fully committed to dedicating my skills and creativity to capturing the beauty and raw emotion of the ocean and the surf culture surrounding it. From epic wave shots to intimate stories of surfers and surrounding communities, my lens will be focused on bringing these narratives to life. I can't wait to dive deeper into this world and share my vision with you all.

UPDATE
As the year transitions, my long-format work, including Phillip Hernandez blog posts and YouTube videos, has experienced a temporary slowdown due to an increase in social engagements typical for this time of year. However, I'm excited to share some recent developments with you.
In early 2024, I made significant updates to my offerings, including a new collaboration with Gallery Canyons based in Scottsdale, AZ. I'm thrilled to announce that select pieces from my portfolio are now available for licensing through their gallery and printing services. Explore the curated collection featuring surf-themed wall art by visiting the link provided (don't forget to use code COLLECTOR10 for a special discount): Gallery Canyons Surf Wall Art Collection.
While some pieces are exclusively available through Gallery Canyons, I'm also retaining certain works with the Darkroom. Additionally, I'm actively exploring opportunities to license my art with other prestigious galleries. Stay connected for updates on these exciting offerings!
For those eagerly awaiting updates and highlight videos from my recent travels to Fiji, Hawaii, and Mexico, rest assured they are in the works. Keep an eye out for these posts, and remember to stay connected for the latest updates and behind-the-scenes content.
Thank you for your continued support, and I look forward to sharing more of my creative journey with you!